Physical Address
304 North Cardinal St.
Dorchester Center, MA 02124
Physical Address
304 North Cardinal St.
Dorchester Center, MA 02124
To get air out of your cooling system, start with a cool engine. Drain old coolant into a sealed container, then refill with the appropriate fresh coolant while gently squeezing hoses to release trapped air.
Start the engine with the heater set to hot and fan low, letting it run at varied RPMs while monitoring temperature. Use a funnel at the radiator neck to catch escaping air bubbles.
Close the system securely once no air bubbles remain. If air persists, further diagnostic steps may be needed.
When you bleed the cooling system, you remove trapped air pockets that can disrupt coolant circulation and cause engine overheating.
These air pockets create insulation barriers within coolant channels, preventing efficient heat transfer. Without proper coolant flow, the engine’s temperature rises, risking severe damage like warped heads or blown gaskets.
Additionally, air in the system reduces the HVAC’s ability to transfer heat, impairing cabin climate control. By systematically removing air, you restore uninterrupted coolant movement, ensuring consistent engine temperature regulation.
This process prevents hotspots and maintains peak thermal efficiency. Neglecting air removal increases the likelihood of overheating, reducing engine longevity and performance.
Thus, bleeding the system is essential for maintaining engine health and preventing costly repairs due to coolant circulation failures.
Proper bleeding often involves opening the radiator bleed valve to release trapped air and ensure the cooling system is fully purged.
Before you begin bleeding the cooling system, make sure the engine is completely cool to avoid burns or pressure-related injuries.
Always ensure the engine is fully cooled before starting to bleed the cooling system to prevent injuries.
Park your vehicle on a level surface and guarantee the engine is fully off. Locate the radiator and coolant reservoir, then wrap a rag around the radiator cap to prepare for safe removal.
Gather necessary tools such as wrenches and screwdrivers for access. Wear gloves and safety goggles to protect yourself from coolant spills. Confirm you have the correct coolant type specified by your vehicle’s manual.
Keep a funnel ready for refilling and a container nearby for catching any drained fluid. Regularly inspecting the radiator cap for cracks, corrosion, or damage helps ensure the cooling system maintains proper pressure during maintenance.

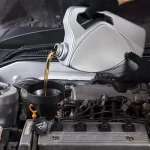
Alright, let’s get started with draining that old coolant safely! First things first, grab a suitable container and position it right beneath the radiator drain plug. This way, you’ll catch all the old coolant without making a mess.
Once you’ve got your container in place, carefully open the drain plug. Let the coolant flow out completely—just give it a moment. When it’s all drained, don’t forget to close the drain plug securely to avoid any leaks later on.
Now, here’s an important step: you need to dispose of that collected coolant properly. Make sure you follow your local environmental regulations to ensure safe handling.
It’s crucial to do this right! Also, always ensure the engine has cooled down before starting to avoid burns or injury from hot coolant, which is an important safety precaution.
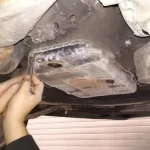
To drain old coolant safely, position a suitable container securely beneath the radiator drain plug to catch all fluid without spills. Choose a container with adequate capacity to hold the entire coolant volume, preventing overflow.
Make sure the container is stable and placed on a flat surface to avoid tipping during draining. Clear the surrounding area of any obstructions or debris that could interfere with access or cause contamination.
Use absorbent materials or drip trays around the work area to catch minor drips. Equip yourself with gloves and safety goggles to protect against coolant exposure.
Confirm the vehicle is parked on level ground and the engine is fully cooled to prevent pressurized fluid release. Proper preparation minimizes environmental hazards and makes certain an efficient, clean coolant draining process.
Additionally, wearing protective gear is essential when handling fluids to ensure safety precautions are met during draining.
With your drainage area prepared and a container securely positioned beneath the radiator drain plug, you can proceed to open the plug carefully.
Use the appropriate wrench or screwdriver to avoid damaging the plug. Turn it counterclockwise slowly to release coolant steadily, preventing splashes.
Once drained, inspect the plug for wear or debris before closing. Make certain a tight seal when reattaching to avoid leaks.
Regularly flushing the cooling system with effective radiator flushes helps maintain optimal coolant flow and prevents corrosion.
| Step | Action |
|---|---|
| 1 | Confirm engine is cool |
| 2 | Position container properly |
| 3 | Select correct tool |
| 4 | Turn drain plug slowly |
| 5 | Inspect and reseal plug |
Following these steps makes certain safe removal of old coolant and prepares the system for bleeding.
Position a suitable container firmly beneath the radiator drain plug to catch the coolant as it empties. This step prevents spills and environmental contamination. Once the coolant has fully drained, close the drain plug securely to avoid leaks during refilling.
Handling the old coolant responsibly is vital due to its toxicity and environmental impact. Follow these steps to collect and dispose of the coolant safely:
Because antifreeze contains ethylene glycol, which is highly toxic and harmful to aquatic life, proper disposal and spill containment are essential.
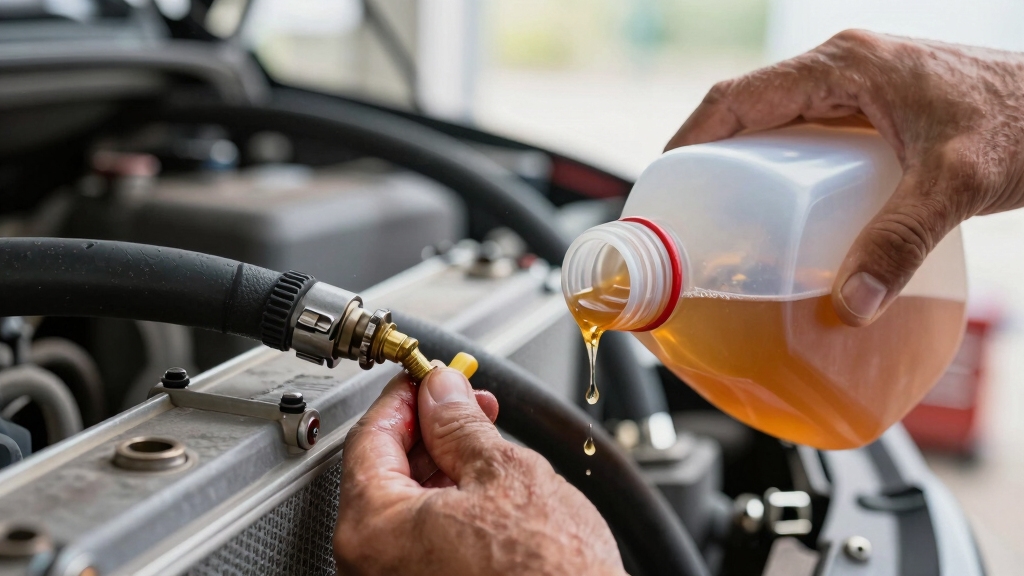
Once you’ve drained the old coolant completely, carefully insert a funnel into the radiator neck or coolant reservoir to begin refilling.
Pour the fresh coolant slowly to minimize air bubble formation. Fill the radiator or reservoir to the manufacturer’s specified level, usually indicated by a full mark.
While pouring, gently squeeze the upper radiator hose to help dislodge trapped air pockets. Continue adding coolant steadily until the level stabilizes.
Avoid overfilling, as coolant expands when heated. Double-check all connections and make certain the radiator drain plug is securely tightened.
Wearing gloves, handle coolant carefully to prevent spills. This precise refilling step sets the stage for proper coolant circulation and effective air bleeding, preventing overheating and maintaining ideal engine temperature.
For best results, use a coolant with corrosion inhibitors compatible with aluminum radiators to protect your engine during operation.
Start the engine while keeping the funnel securely in place to prevent coolant loss. This step helps air bubbles escape as the coolant circulates through the system.
Start the engine with the funnel in place to allow trapped air bubbles to escape during coolant circulation.
Next, follow these procedures precisely:
As the engine runs, watch the coolant level in the funnel drop, indicating air is escaping. Add coolant as needed to maintain the proper level during this bleeding process. For optimal engine protection, ensure the engine has been properly warmed up to allow adequate lubrication before beginning this procedure.
After running the engine and burping out trapped air, shut it off and let it cool completely before proceeding. Once cooled, check coolant levels in both radiator and reservoir.
Top up if necessary to maintain correct fill levels. Replace and securely tighten the radiator cap until it clicks to guarantee a proper seal. Conduct a brief test drive, then recheck coolant levels to confirm no air remains. If levels hold steady, your system is fully bled.
Proper installation and maintenance of the radiator help ensure thermal stress resistance and long-term durability.
| Step | Action | Purpose |
|---|---|---|
| Cool Down | Shut off engine, wait 30+ mins | Prevent burns, stabilize pressure |
| Level Check | Inspect radiator & reservoir | Ensure coolant at proper levels |
| Cap Replacement | Tighten radiator cap securely | Seal system, prevent air entry |
If you find that air keeps returning to your cooling system, it usually means there’s a persistent leak or maybe even a gasket failure that’s letting air in. It’s definitely worth your time to check some common leak points.
You know, things like hose connections, radiator seals, and the head gasket area—these are often where damage or wear can sneak in.
But hey, if you’re having trouble pinpointing the source, don’t fret! You might want to consider using some professional diagnostic tools. A pressure tester or a combustion leak detector can really help you uncover those hidden issues that are causing the air to keep coming back.
Just take it one step at a time, and you’ll get to the bottom of it! Regular monitoring is necessary to detect early signs of internal leaks and prevent further engine damage.
When air keeps reappearing in your cooling system despite repeated bleeding, it often indicates an underlying issue such as a leaking head gasket, cracked hoses, or a faulty radiator cap.
To address persistent air pockets, you should:
Resolving these root causes prevents continuous air ingress. This assures your coolant circulates properly and maintains peak engine temperature without recurring air pockets.
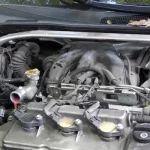
Identifying common leak locations helps you stop air from continuously entering your cooling system.
Start by inspecting the radiator cap for a worn or damaged seal, which can allow air ingress.
Check all hose connections, including radiator, heater, and bypass hoses, for cracks, loose clamps, or splits.
Examine the water pump area for coolant seepage, as a faulty gasket or seal can introduce air.
Don’t overlook the thermostat housing, where gasket failure often causes leaks.
Also, inspect the coolant reservoir for cracks or loose fittings.
If you spot any damage, replace or tighten components immediately.
Use a pressure tester to confirm leaks under system pressure.
Addressing these areas will prevent air from re-entering, ensuring proper coolant circulation and reducing the risk of overheating caused by persistent air pockets.
Although you’ve inspected common leak points and bled the system thoroughly, persistent air pockets indicate a deeper issue requiring professional diagnostics.
When air keeps returning, you need specialized tools and expertise to identify hidden faults. Consider these professional diagnostic steps:
If air recurs despite your efforts, have a qualified mechanic perform these diagnostics to guarantee reliable, long-term cooling system integrity.
You shouldn’t use just any coolant to refill your cooling system.
Always refer to your vehicle’s manual to identify the correct coolant type and specifications.
Using the wrong coolant can cause chemical reactions, corrosion, or reduced efficiency.
Stick to the recommended coolant to guarantee proper heat transfer and protect engine components.
If unsure, consult a professional or your vehicle manufacturer before refilling to avoid costly damage or system failure.
Bleed your vehicle’s cooling system biannually or whenever you replace coolant.
Regularly removing trapped air prevents overheating and preserves performance.
After draining and refilling coolant, run the engine to release bubbles.
Monitor temperature and coolant levels closely during this process.
If you detect persistent air pockets, repeat bleeding promptly.
Consistent care curtails cooling complications, ensuring efficient engine operation and avoiding costly damage caused by improper circulation or overheating.
Yes, you should bleed the cooling system after every coolant change.
Air pockets form during draining and refilling, causing overheating and poor circulation.
After filling, start the engine with the radiator cap off. Run it at 3,000 RPM and set the heater to maximum.
Squeeze hoses to release trapped air. Monitor coolant levels, topping up as needed.
Proper bleeding guarantees efficient cooling and prevents engine damage.
You’ll notice engine overheating and fluctuating temperature gauge readings if air’s trapped in the cooling system. The heater may blow cold air because airflow is blocked, reducing HVAC efficiency.
You might also hear unusual gurgling sounds as coolant circulates unevenly. These symptoms indicate improper coolant flow, risking engine damage.
Address trapped air promptly by bleeding the system to restore peak temperature regulation and prevent overheating.
Bleeding the cooling system can fix engine overheating permanently if trapped air is the root cause.
Like a knight clearing a castle’s moat, you remove air pockets that block coolant flow and cause hot spots.
Make sure you follow steps precisely: drain old coolant, refill slowly, squeeze hoses, run the engine at high RPM, and top up after cooling.
If overheating persists, inspect for leaks or mechanical faults beyond air removal.
By following these steps carefully, you’ll make certain your cooling system runs smoothly without trapped air causing overheating or damage. Remember, patience is key; don’t rush the process or skip steps, or you might be chasing your tail trying to fix recurring issues.
Once you’ve bled the system properly and confirmed no air remains, your engine will stay cool and perform efficiently. Keep an eye on it, and you’ll avoid costly repairs down the road.