Physical Address
304 North Cardinal St.
Dorchester Center, MA 02124
Physical Address
304 North Cardinal St.
Dorchester Center, MA 02124
If your vehicle’s engine is running on milky oil, it’s like a warning sign flashing before your eyes. It symbolizes trouble brewing beneath the surface, a potential disaster waiting to happen. But fear not, you can flush away this milky menace and restore your engine’s health.
You can opt for oil replacement and engine run. This involves draining the milky oil, replacing it with fresh oil, and running the engine to circulate the new oil throughout the system.
Alternatively, you can choose the diesel flush method. It entails adding diesel fuel to the engine, running it briefly, and draining the contaminated mixture.
Here, we will guide you through the precise steps to rid your engine of milky oil, ensuring its longevity and performance. Let’s dive in and conquer this challenge together.
To flush milky oil from a vehicle engine, you have two methods to consider. Both methods can effectively remove milky oil and restore proper engine function.
You can flush milky oil from your vehicle’s engine by using the oil replacement and engine run method, follow these steps:
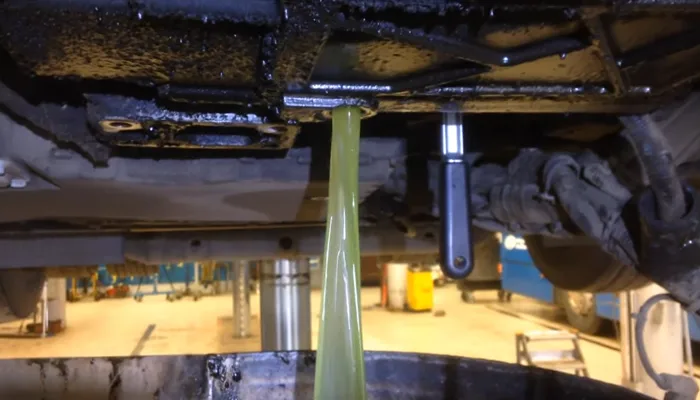
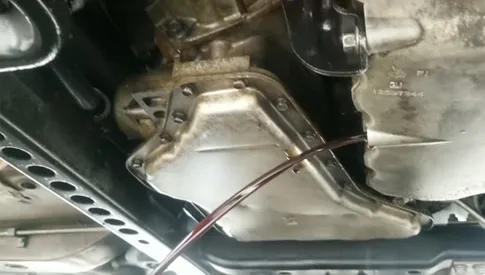
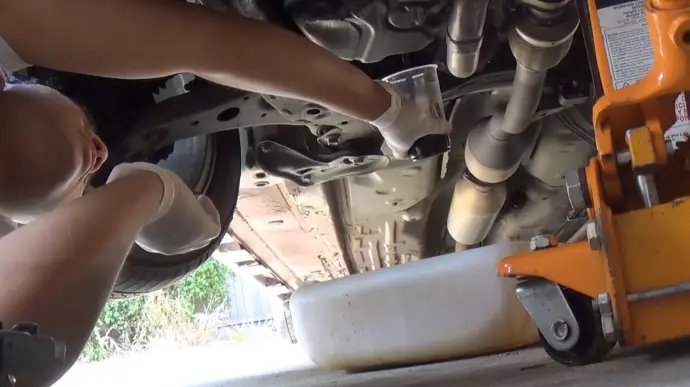
To start draining the milky oil from your vehicle engine, use an appropriate oil drain pan to ensure the engine is cool.
Position the drain pan underneath the vehicle and locate the oil drain plug. Typically, it is located near the engine block. Use a socket wrench to loosen and remove the drain plug, allowing the milky oil to flow into the drain pan.
Once the oil has fully drained, replace the drain plug (if necessary; otherwise, it’s fine) and move on to the next step in the flushing process.
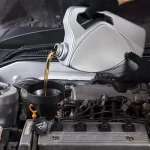
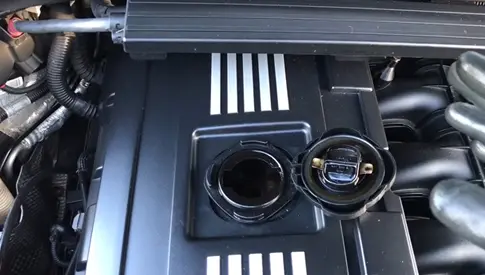
Now, ensure that you use fresh, high-quality motor oil that meets the manufacturer’s recommendations for your specific vehicle. Then, fill the engine with the new oil, making sure it reaches the proper oil level.
Start the engine and let it run for at least 30 minutes at operating temperature. This will allow the new oil to circulate through the engine, effectively dissolving any remaining contaminants. Running the engine ensures the fresh oil reaches all the necessary components, maximizing its cleaning and lubricating effects.
After running the engine for sufficient time, let it off to cool down, then change the oil filter. It’s crucial to replace the oil filter to prevent any clogs caused by contaminants.
Carefully remove the old filter using an oil filter wrench, making sure to catch any oil that may spill. Once removed, dispose of the old filter properly.
After changing the oil filter, you must repeat steps 1 to 3 (if necessary) to flush the milky oil from your vehicle engine completely. Then again, inspect the oil filter, in cases where the contamination is severe, a few repetitions may be required to ensure thorough removal of the milky oil.
This step is crucial to prevent any residual contamination that could cause further damage to your engine. By repeating the process, you can ensure that your engine is properly cleaned and ready for optimal performance.
To flush milky oil from your vehicle engine using the diesel flush method, follow the steps:
Add a gallon of diesel fuel into the crankcase where the oil was drained. Pour the diesel fuel slowly and carefully to avoid spills or splashing. The diesel fuel will help break down any contaminants or water that may be present in the engine, allowing for a more thorough flush.
After adding a gallon of diesel fuel to the crankcase, you can now proceed to the next step by allowing the diesel to sit in the engine. This step is crucial as it gives the diesel fuel enough time to break down the sludge and emulsion effectively.
The sitting period typically lasts for at least 10-15 minutes. During this time, the diesel fuel will penetrate the milky oil and start to dissolve the contaminants, preparing them for removal in the next steps of the flushing process.
Now drain the diesel fuel from the crankcase and replace it with fresh motor oil. This will help to further flush out any remaining residue or contaminants that were not broken down by the diesel fuel. Repeat the process until the diesel runs clear, indicating that the milky oil has been flushed out.
After completing the diesel flush, refill the engine with the recommended motor oil and ensure the oil filter is replaced. Carefully pour the oil into the engine, taking care not to spill or overfill. Once the engine is filled to the appropriate level, securely tighten the oil cap.
To prevent milky oil buildup in your vehicle engine, there are several key steps you can take.
Regularly check and maintain your vehicle’s cooling system, including the radiator, hoses, and thermostat. Ensure there are no leaks in the cooling system that could allow coolant to mix with the engine oil.
A well-functioning cooling system helps regulate engine temperature and prevents overheating, reducing the risk of gasket failures.
Additionally, make sure to use the correct type and amount of coolant recommended by the manufacturer. Regularly flush and replace the coolant according to the maintenance schedule provided in your vehicle’s manual.
Fresh, clean oil acts as a protective barrier, preventing contaminants and water from accumulating in the engine. Over time, oil can degrade and become less effective at performing its essential functions. When this happens, the oil is more likely to emulsify when mixed with coolant, resulting in milky oil.
With regular oil changes, you ensure that your engine is consistently supplied with fresh, clean oil, reducing the risk of milky oil buildup and potential engine damage.
To minimize milky oil buildup in your vehicle engine, it’s important to:
Minimize extended idling and maintain regular operation of your vehicle. Extended idling can contribute to condensation in the engine, leading to the formation of milky oil.
Instead, it’s recommended to allow the engine to reach its operating temperature by driving the vehicle regularly. This helps to evaporate any accumulated moisture and ensures that the oil remains free from contamination.
Regular operation of your vehicle also helps to circulate the oil throughout the engine, preventing it from sitting idle and potentially forming milky oil.
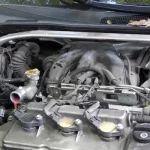
Inspect your vehicle for internal leaks that may contribute to milky oil buildup in the engine. Common sources of these leaks include failing head gaskets, damaged cylinder heads, or cracked engine blocks.
To identify potential leaks, perform a visual inspection of the engine components and check for any signs of coolant leakage or oil contamination. Look for coolant stains or puddles underneath the vehicle or around the engine area.
Additionally, monitor your coolant levels and oil condition regularly. If you notice a decrease in coolant levels or the presence of a milky appearance in the oil, it’s crucial to address the issue promptly.
Timely repairs and maintenance are essential in preventing further damage and ensuring the proper functioning of your engine.
Milky oil is a sign of coolant mixing with the oil, indicating a potential internal leak in the engine. This can lead to reduced engine life and damage.
The coolant dilutes the oil’s lubricating properties, causing increased friction and wear on engine components. As a result, your engine may experience decreased performance, including reduced power and acceleration.
Additionally, milky oil can affect fuel economy and efficiency by reducing the engine’s ability to combust fuel effectively. This inefficiency leads to increased fuel consumption and higher emissions.
If you notice milky oil in your vehicle’s engine, it’s important to understand that it could be a sign that your engine is experiencing a problem.
Milky oil indicates that there’s water contamination in the oil, which is typically caused by a failed engine gasket. This contamination can lead to various issues that can affect the performance and longevity of your engine.
Water in the oil can cause corrosion and rust to form on vital engine components, leading to increased friction and wear. It can also dilute the oil’s lubricating properties, resulting in inadequate lubrication and increased engine friction.
This can lead to overheating, reduced engine efficiency, and potentially even engine failure if not addressed promptly.
If the head gasket isn’t to blame, other potential culprits could be causing the milky oil.
One possibility is a cracked cylinder head, allowing coolant to mix with the engine oil. Another potential cause is a cracked cylinder, where coolant can enter the combustion chamber and mix with the oil.
Additionally, a bad engine oil cooler, also known as a heat exchanger, could be the source of the problem. This component is responsible for cooling the engine oil, and if it fails, coolant can contaminate the oil.
Flushing milky oil from your vehicle’s engine is crucial to prevent further damage. Milky oil is a distressing issue that can compromise the performance and longevity of your vehicle’s engine. The causes can range from coolant leaks to condensation, and addressing it promptly is crucial.
By taking preventive measures such as regular maintenance and using high-quality oil, you can avoid the buildup of milky oil. Don’t let your engine drown in a sea of milky oil. Take action and keep it running smoothly.