Physical Address
304 North Cardinal St.
Dorchester Center, MA 02124
Physical Address
304 North Cardinal St.
Dorchester Center, MA 02124
Oil pan gaskets can fail and leak, leading to expensive repairs and engine damage if left unattended. We must, therefore, understand and know the basics of repairing a leaking oil pan gasket.
To fix a leaking oil pan gasket, park the vehicle on a stable surface to ensure safety during the repair process. Now drain the engine oil and remove the oil pan from the engine. Access the old gasket, remove it, and clean the area thoroughly. After that, install the new gasket and reassemble the oil pan.
As part of this article, I’ll discuss the steps to fix a leaking oil pan gasket and describe step-by-step instructions to guide you through the process. So keep reading.
Here are eight steps I have listed to fix a leaking oil pan gasket on a vehicle.
To ensure a successful repair, you must have the right tools and materials at hand. Here’s what you’ll need:
Now, park your vehicle on a stable surface and ensure it is securely in place to fix the leaking oil pan gasket. Choose a solid and level area to park the vehicle, such as a concrete driveway or a garage floor. This will provide stability and prevent accidental movement while working on the oil pan gasket.
Drain the old engine oil to ensure safety and accessibility. Locate the oil drain plug on the bottom of the oil pan. Using a socket wrench, carefully loosen the plug and place the container directly underneath it to catch the oil.
Slowly unscrew the plug to allow the old oil to flow out completely. Once all the oil has drained, tighten the drain plug back into place securely.
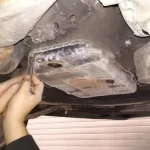
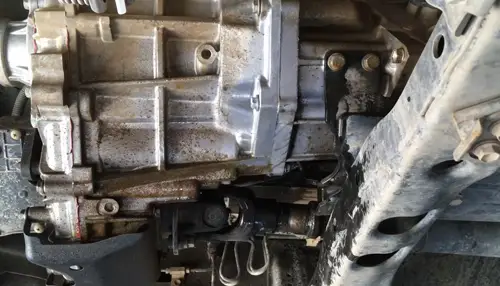
The oil pan is typically secured by bolts or RTV silicone. Located the bolts securing the oil pan to the engine block. Then, use the socket wrench to loosen and remove the bolts, making sure to follow the right sequence.
Once all the bolts are removed, gently tap the oil pan with a rubber mallet to break the seal formed by the RTV silicone. Slowly lower the oil pan with a steady hand, being cautious not to spill any remaining oil.
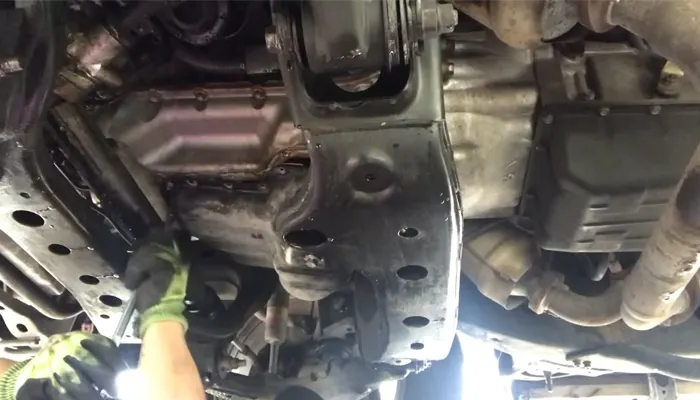
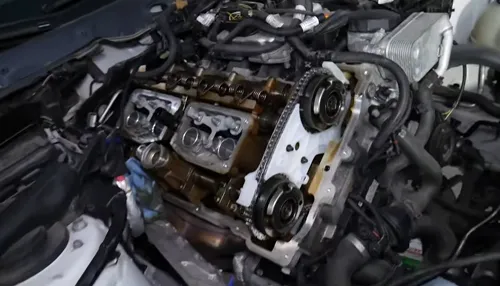
With the oil pan successfully removed, it’s now time to proceed with removing the old gasket and thoroughly cleaning the gasket surface.
Use a gasket scraper to carefully scrape any remaining gasket material from the oil pan and the engine block. Be sure to scrape in a back-and-forth motion, applying steady pressure to avoid damaging the surfaces.
Once most of the gasket material is removed, use a clean rag and a suitable solvent to wipe away any residue. Make sure to clean the oil pan and the engine block surfaces until they’re completely free from any debris or gasket remnants.
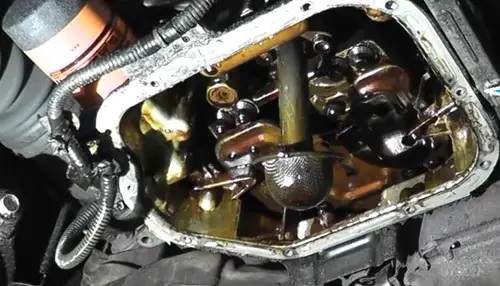
Now, carefully align and securely fasten the new oil pan gasket, following the instructions and applying any necessary sealant. Start by placing the gasket on the oil pan, making sure the bolt holes align correctly.
Then, carefully position the oil pan onto the engine block, ensuring that the gasket is held in place. Use the correct torque specifications to tighten the oil pan bolts, avoiding over-tightening, which can damage the gasket or the oil pan.
Follow the manufacturer’s instructions regarding the use of sealant. Apply the sealant as directed, ensuring complete coverage. This will provide an extra layer of protection against leaks and help prolong the lifespan of the gasket.
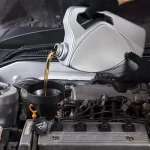
After replacing the oil pan gasket, carefully refill the engine with fresh oil, ensuring proper lubrication for optimal performance.
Locate the oil filler cap, typically located on the top of the engine. Remove the cap and set it aside. Then, insert a funnel into the oil filler hole to prevent any spills or splashes.
Slowly pour the fresh oil into the funnel, allowing it to flow into the engine. Don’t overfill, which can cause leaks or affect the engine’s performance. After refilling the engine with the appropriate amount of oil, tighten the oil filler cap securely.
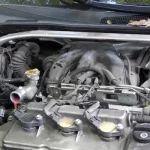
After refilling the engine with fresh oil, start the engine and thoroughly check for any leaks to ensure the successful fix of a leaking oil pan gasket in a vehicle. Look for any drips or oil spots on the ground underneath the vehicle.
Through my research, I have identified several common reasons why an oil pan gasket may leak in a vehicle.
Due to the constant exposure to heat, oil, and engine vibrations, the gasket material can deteriorate over time, leading to leaks between the oil pan and the engine block.
This normal wear and tear results from the harsh conditions under which the gasket operates. The high temperatures generated by the engine cause the gasket material to degrade, becoming brittle and less pliable. Constant contact with oil can also cause the material to break down, losing its ability to maintain a proper seal.
As the engine heats up during operation, the metal components, including the oil pan and the engine block, expand. Similarly, when the engine cools down, these components contract.
This continuous expansion and contraction can lead to the gradual deterioration of the gasket’s sealing capabilities. Over time, the gasket may lose its ability to maintain a tight seal, resulting in oil seepage around its edges.
Loose bolts can cause the gasket to lose its seal and allow oil to escape. Also, inadequate sealant can contribute to gasket leaks. The sealant is a barrier to prevent oil from seeping through gaps between the oil pan and the engine block.
In my research, I’ve realized that any residue, old gasket material, or debris left on the mounting surfaces can prevent the gasket from sealing effectively. Even the smallest imperfection can compromise the gasket’s ability to prevent leaks.
The gasket sealer creates a reliable and long-lasting seal between the oil pan and the engine block. When an inadequate or improper sealer is used, it fails to provide the necessary sealing properties, leading to leaks.
Inadequate sealer may not have the required viscosity or adhesive properties to withstand the harsh conditions within the engine. Conversely, using an improper sealer, such as one that isn’t compatible with the materials of the gasket or engine, can cause chemical reactions that degrade the sealing capabilities.
One significant consequence of driving with a leaky oil pan gasket is a reduction in fuel efficiency and an increase in fuel consumption.
When the gasket is faulty, it allows oil to leak out of the oil pan, leading to inadequate lubrication of the engine components. As a result, the engine has to work harder to overcome the increased friction and heat generated.
This increased workload causes the engine to consume more fuel to maintain its performance. Also, the reduced lubrication can lead to higher levels of friction, which further decreases fuel efficiency.
For long-term safety during or after driving, I recommend using a nitrile oil pan gasket. Nitrile is a rubber derived from petroleum that is synthetically produced and offers excellent resistance to oil, making it an ideal material for sealing oil pans.
It’s commonly used in the oil field and storage tanks due to its superior oil resistance properties.
Nitrile gaskets are designed to withstand the harsh conditions and high temperatures commonly found in engines. They have a long lifespan and provide a reliable seal to prevent oil leaks. Also, nitrile gaskets are available in a cork and nitrile combination, further enhancing their sealing capabilities.
Fixing an oil pan gasket leak can range between $400 and $500, with most of the cost attributed to labor. Generally, the labor cost for this repair is estimated to be between $300 and $400, while the parts required for the job are expected to cost around $120.
These figures may vary depending on the make and model of the vehicle, as well as the location and the specific repair shop. Also, the cost can be influenced by any additional repairs or maintenance needed while fixing the oil pan gasket leak.
Fixing a leaking oil pan gasket is a task that requires patience, tools, and some mechanical skill. But with the proper knowledge and preparation, it’s a repair that anyone can accomplish.
Checking for leaks after completion is essential to ensure the repair is successful. Choosing a high-quality oil pan gasket for the long run is essential to ensure a durable solution. As always, if you’re unsure about any step in the process, consult a professional mechanic or an experienced friend for guidance.
While the cost of fixing an oil pan gasket leak can vary, it’s a necessary investment to avoid more significant and costly damages in the future.