Physical Address
304 North Cardinal St.
Dorchester Center, MA 02124
Physical Address
304 North Cardinal St.
Dorchester Center, MA 02124
Proper oil filter installation ensures the efficient working of your vehicle’s engine. One of the most common mistakes that people commit during the process is over-tightening or under-tightening the oil filter.
Such mistakes can lead to leaks, engine damage, and a hassle during the next oil change. So, how tight should an oil filter be when securing it to your vehicle’s engine?
You need to tighten an oil filter by hand until it stops naturally, then give it another quarter turn, equating to about 90 degrees. This approach ensures a proper seal without the risk of over-tightening, which can make it difficult to remove the filter during the next oil change.
We will discuss in detail how to replace and properly tighten an oil filter on your vehicle. Knowing the right amount of tightness will keep your engine healthy and make future maintenance easier.
To install a new oil filter and tighten it properly on your vehicle, follow these steps:
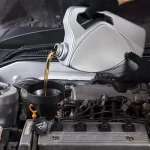
Step 1: Drain the old oil
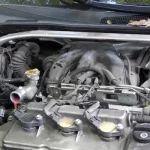
Step 2: Remove the old oil filter
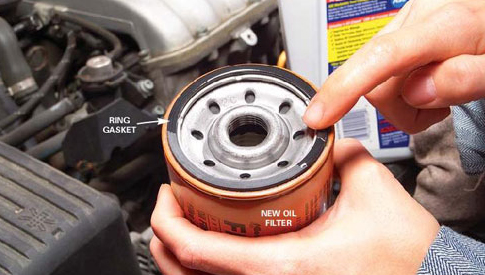
Step 3: Lubricate the gasket
Step 4: Install the new oil filter
Step 5: Refill with fresh oil and check for leaks
Now, check out each step in the oil filter replacement and tightening procedure to ensure your vehicle’s engine runs smoothly.
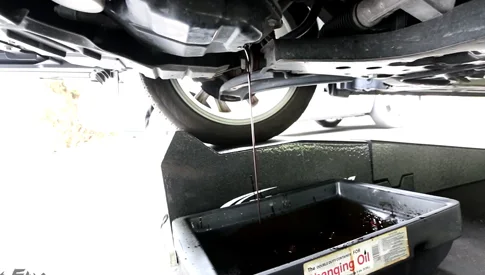
Start by parking your vehicle on a level surface and engaging the parking brake. Then, locate the oil drain plug on the oil pan beneath your vehicle. The oil drain plug is typically positioned at the bottom of the engine.
Place an oil drain pan underneath the drain plug and, using a wrench, carefully loosen and remove the plug. Allow the old oil to completely drain into the pan, which may take a few minutes. Be patient during this process.
Once the oil has drained, replace the drain plug and tighten it securely. Ensure that it’s tight enough to prevent any leaks, but be cautious not to over-tighten it, as this can damage the oil pan or the plug itself.
Next, you need to remove the old oil filter from your vehicle. Locate the cylindrical metal filter, which is usually near the engine and marked as a filter on the top, bottom, or sides of the engine.
Use an oil filter wrench to grip the filter and turn counterclockwise to loosen it. Continue turning until the filter is loose enough to remove by hand. Carefully unscrew the old filter and allow any remaining oil to drain into the pan.
Before installing the new oil filter, it’s important to lubricate the rubber gasket on the top of the filter. This helps create a proper seal between the filter and the engine.
Apply a small amount of fresh oil to the gasket, making sure it’s evenly distributed. This will also prevent the gasket from sticking or vulcanizing to the filter base.
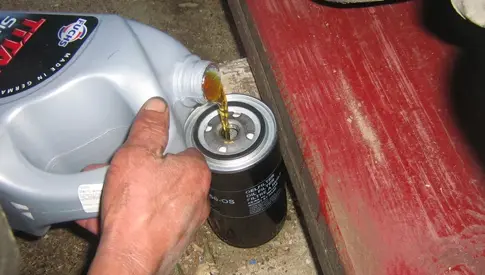
Now, it’s time to install the new oil filter. Take the new oil filter and refer to the manufacturer’s instructions for any specific recommendations.
Position the filter beneath the filter mounting surface on the engine. Screw the new filter onto the filter housing by hand, turning it clockwise until the gasket contacts the mounting surface.
Once it’s snug, give it an additional quarter turn. Avoid using an oil filter wrench for this step; hand-tightening is generally sufficient.
After properly installing the new oil filter, it’s now time for you to refill your vehicle with fresh oil and check for any leaks.
Consult your vehicle’s owner’s manual to determine the recommended oil capacity and the type of oil to use.
Carefully pour the appropriate amount of fresh oil into the engine through the oil fill cap. Make sure to replace the oil fill cap securely. Start your vehicle and allow it to run for a few minutes to circulate the fresh oil.
Once the engine is turned off, check for any oil leaks around the filter and drain plug. If you spot any leaks, address the issue immediately by tightening the filter slightly more or checking the drain plug for proper sealing.

If your oil filter remains loose even after attempting to tighten it, there are several possible reasons for this.
Check for any visible signs of damage or wear on the oil filter, as these can be indicators of why it remains loose despite your attempts to tighten it.
One common reason for a loose oil filter is the constant vibrations and movement your vehicle experiences while driving. These vibrations can gradually cause the filter to loosen over time. Even if you initially tightened it properly, the constant motion can work the filter loose.
The vibrations from the engine and the road can create a shaking effect that affects the tightness of the oil filter. Additionally, if the oil filter isn’t securely fastened, the vibrations can cause it to wiggle and become even looser.
When installing a new oil filter, it’s important to ensure that only one gasket is used to prevent the filter from remaining loose, even after tightening it. Double gaskets can create an improper seal, leading to oil leaks and potential engine damage.
The presence of two gaskets can prevent the filter from properly sitting against the mounting surface, causing it to loosen over time. This can result in oil leakage, decreased oil pressure, and potential engine failure.
To avoid this issue, it’s crucial to always remove the old gasket before installing a new oil filter. Carefully inspect the filter housing for any remnants of the old gasket and ensure that only one gasket is in place before tightening the filter according to the manufacturer’s specifications.
Make sure to tighten the oil filter securely to prevent it from becoming loose again after tightening it.
In rare cases, the threading on the oil filter or the engine’s filter housing may be damaged or worn out, causing the filter to feel loose even when it has been tightened correctly. Damaged threading can prevent the filter from securely attaching to the engine, compromising the effectiveness of the oil filtration system.
If you suspect that the threading is damaged, it’s recommended to consult a professional mechanic for inspection and potential repairs.
They’ll be able to assess the condition of the threading and determine if any repairs or replacements are necessary to ensure a secure and effective connection between the oil filter and the engine.
Ensure that the oil filter is properly aligned and threaded on straight to keep it from coming loose, even after you tighten it securely. Improper alignment can lead to a loose connection between the oil filter and the engine, resulting in potential leaks and damage.
When installing a new oil filter, it’s crucial to align it correctly with the filter housing. If the filter isn’t threaded on straight, it may not engage properly with the housing, causing it to remain loose even after tightening. This can happen if the filter is forced or cross-threaded during installation.
To avoid this issue, take your time and carefully align the filter with the housing, ensuring that it threads smoothly and securely.
If you have overtightened the oil filter in the past, it can cause the filter to remain loose even after you attempt to tighten it securely. Overtightening the oil filter can damage the gasket or threading, which is essential for a proper seal.
The gasket is a rubber or silicone ring that creates a tight seal between the filter and the engine block. If the gasket is damaged, it may not be able to create a proper seal, resulting in the filter being loose.
Similarly, overtightening can strip the threading on the oil filter housing, preventing the filter from being securely fastened.
To avoid this issue, it’s crucial to follow the recommended guidelines for tightening the oil filter during an oil change.
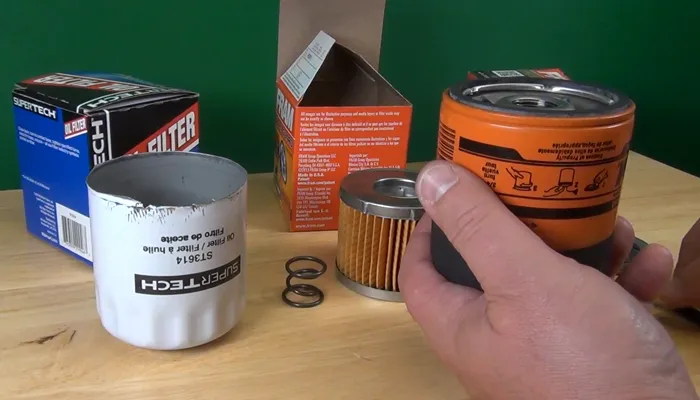
When using an incorrect filter type for your vehicle, the oil filter may not stay tight even after tightening it securely due to the mismatch in specifications.
Filters come in various sizes and designs, and using one that doesn’t match your vehicle’s specifications can lead to an improper connection.
The incorrect filter type may have a different diameter or thread size, preventing it from fully engaging with the filter housing. This can result in a loose fit, allowing oil to leak out and potentially causing engine damage.
Additionally, the incorrect filter may not have the necessary sealing mechanism, such as an anti-drain back valve, which can further contribute to the loose fit. To ensure a proper and secure fit, always use the correct filter type specified by your vehicle manufacturer.
You should regularly check the tightness of your vehicle’s oil filter to ensure it remains secure.
It’s advisable to inspect the oil filter’s tightness during regular maintenance checks, such as every time you change the oil or about every 1,000 to 3,000 miles. This will help prevent any potential leaks or damage caused by a loose filter.
Additionally, it’s a good practice to verify the filter’s tightness after any particularly long drives or journeys. The constant vibrations and movements during extensive travel can sometimes cause the filter to loosen.
Installing an oil filter without its gasket can lead to oil seepage or leaks in your vehicle. The gasket creates a tight seal between the filter and the engine. Without it, the filter can’t effectively prevent oil from escaping. Over time, this can result in oil seeping out around the filter area.
If you suspect that the gasket is missing, it’s important to remove the filter immediately and replace it with one that has a gasket. Failing to do so may result in oil loss and potential damage to your engine’s oil system.
A properly tightened oil filter is crucial for your vehicle. Failing to do so can lead to a host of issues, from oil leaks to engine damage.
Over-tightening or under-tightening can both have adverse effects. So, use your hand to tighten the filter until it stops naturally, then give it that additional quarter turn.
As a result, you get a good seal without over tightening. Regularly checking the filter’s tightness during oil changes or maintenance checks is a smart practice to ensure your engine runs smoothly.