Physical Address
304 North Cardinal St.
Dorchester Center, MA 02124
Physical Address
304 North Cardinal St.
Dorchester Center, MA 02124
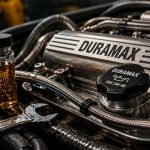
Maintaining the health and performance of your vehicle’s engine is essential for its longevity and reliability. One common issue that can plague engines is the sticking of oil rings, which can lead to reduced performance and increased oil consumption.
Some simple tools will help you unstick an oil ring. A screwdriver, hammer, and chisel are among these tools. Remove the spark plugs to gain access to the oil rings. Take off the valve cover and use the screwdriver to pry out the oil rings.
Once they’re loose, give them a few taps with a hammer and chisel to separate them from the piston. Simply slip them off the piston and clean up any remaining bits of debris.
Here, we will walk you through the process of unsticking oil rings in vehicles, as well as provide tips for preventing this issue. Understanding these techniques can help keep your engine running smoothly and efficiently.
In order to unstick an oil ring, you’ll need a few simple tools. These include a screwdriver, a hammer, and a chisel. Now, it is important to follow the following tips if you would like to remove an oil ring successfully:
Start by locating the spark plug wires, which are usually connected to the top of the engine. Gently twist and pull each wire to disconnect it from the spark plug. This will expose the spark plugs.
Insert the screwdriver into the spark plug socket and turn it counterclockwise to loosen the spark plug. Once loose, carefully remove the spark plug from the engine. Be cautious not to drop the spark plug, as it can easily break. Repeat this process for each spark plug in the engine.
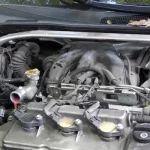
The oil pan is typically located underneath the vehicle’s engine. Look for the bolts around the perimeter of the oil pan and use the appropriate size wrench to loosen them. Start at one corner of the oil pan and work your way around, gradually loosening each bolt.
Keep track of the bolts as you remove them. They’ll need to be reinstalled later. Once all the bolts are loose, you can lift the oil pan off easily. Be careful not to damage the gasket between the oil pan and the engine block as you remove it.
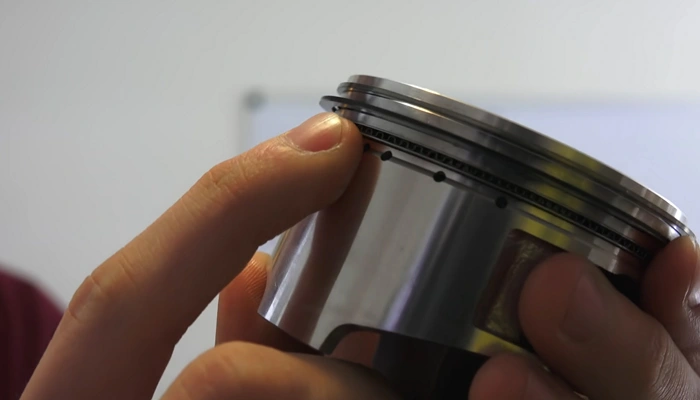
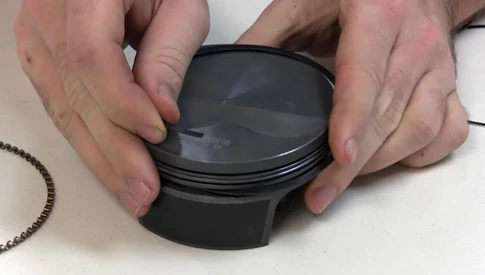
To begin removing the piston rings and unsticking oil rings in your vehicle, start by breaking the ring’s seal. To do this, use hammers and chisels. Position the chisel against the ring and apply pressure, twisting if necessary. This will help loosen the ring and make it easier to remove.
Once the seal is broken, it’s time to knock the ring out of its groove. Take the hammer and carefully tap the ring, starting at one end and working your way around. Be sure to use controlled force to prevent any damage to the piston or ring. With each tap, the ring should gradually come loose.
Continue this process until all the piston rings have been successfully removed.
Now, it’s time for you to inspect the gaps in the piston rings in your vehicle. The gaps play a crucial role in the functioning of the rings, as they allow for proper oil control and compression.
To clean the piston and ring grooves and unstick oil rings in your vehicle, grab a rag and some WD-40. Begin by applying the WD-40 to the rag and saturate it well.
Then, carefully wipe down the piston and ring grooves. Be thorough in your cleaning, ensuring that all of the oil and dirt are removed from the surfaces. Pay close attention to the grooves, as any buildup can prevent the rings from functioning properly.
Use gentle but firm pressure as you wipe, ensuring you reach all areas. Take your time to ensure thorough cleaning, as this step is crucial in preparing the piston and ring grooves for the installation of the new ring.
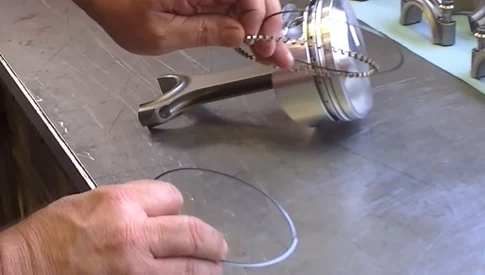
Start by ensuring that the ring is the correct size for the piston groove. Carefully position it, making sure that the gaps are evenly spaced around the circumference of the piston. This is crucial for optimal performance and oil control.
Once the ring is aligned, gently tap it into place using a hammer and chisel. Be careful not to damage the ring or the piston while doing this. The chisel can be used to guide the ring into the groove and ensure it’s seated correctly.
Apply even pressure to avoid any distortion or misalignment. Once the ring is securely in place, it’s ready for further assembly.
There are a few tips that you can follow in order to prevent the oil ring from sticking again in the future:
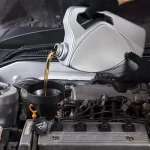
The vehicle engine’s components must be properly lubricated and functioning by changing the oil regularly. Over time, the oil can become contaminated with dirt, debris, and other particles, leading to sludge formation. When this sludge accumulates on the oil ring, it sticks and impairs sealing.
By replacing the oil every 3,000 miles, you ensure fresh, clean oil circulates through the engine. This reduces the likelihood of sludge formation and prevents the oil ring from becoming stuck again.
Additionally, regularly changing the oil helps remove any built-up deposits, ensuring optimal engine performance and longevity.
If you want to ensure that the oil ring doesn’t stick again in the future, ensure that you consistently use high-quality oil designed specifically for use in your vehicle. Using low-quality or incorrect oil can lead to deposits and sludge buildup, which can cause the oil ring to stick.
High-quality oil contains additives that help to keep the engine clean and prevent the formation of deposits. It also has a higher resistance to thermal breakdown, ensuring that it maintains its lubricating properties for longer periods.
When choosing oil, refer to your vehicle’s owner’s manual to determine the recommended viscosity and oil specifications.
Cleaning the engine is essential to vehicle maintenance and helps prevent various issues, including a stuck oil ring. Inspect the engine for any visible dirt or debris to clean your vehicle effectively. Use a soft brush or cloth to remove any buildup on the piston and surrounding areas gently.
Consider using a high-quality engine cleaner or degreaser to dissolve stubborn oil deposits. Regular cleaning will help keep your vehicle in optimal condition and prevent future oil ring sticking.
Using a filter is crucial for maintaining the cleanliness of the oil and preventing the accumulation of dirt and debris that can lead to the oil ring becoming stuck. The filter acts as a barrier, trapping particles and preventing them from circulating in the oil system.
When selecting a filter, choosing one compatible with your vehicle’s make and model is important. Regularly inspect and replace the filter according to the manufacturer’s recommendations to ensure optimal performance.
As a preventative measure, you should regularly change the filter. The filter is crucial in keeping the oil clean and free from contaminants. Over time, the filter accumulates dirt, debris, and other particles that can hinder the smooth operation of the oil ring.
By changing the filter regularly, you ensure that the oil flowing through the engine is filtered properly, minimizing the risk of the oil ring becoming stuck again. According to the manufacturer’s recommendations, filters should be replaced between 3,000 and 10,000 miles, depending on the vehicle and driving conditions.
The main signs of oil ring failure or being stuck include discolored or excessive exhaust emissions. Other signs include oil leaks or significant oil consumption, decreased engine performance, sluggish acceleration, and oil in the intake manifold.
Stuck piston rings can indeed contribute to increased fuel consumption. When piston rings are damaged or stuck, oil leaks into combustion chambers. This, in turn, results in a less efficient combustion process, leading to increased emissions and higher fuel consumption.
If you notice that your engine is producing more smoke than usual, it may be indicative of worn or damaged piston rings. Ensuring your piston rings are in good condition is crucial for maintaining optimal fuel efficiency.
Stuck piston rings can lead to a lack of compression in the engine, which can significantly impede its proper operation. The primary function of piston rings is to regulate the flow of oil along the cylinder walls, and when they fail to perform this function correctly, it can result in a compression deficit.
Ensuring that your vehicle’s oil rings remain unstuck is crucial for maintaining the optimal functioning of your engine. Adhere to preventive measures, such as regular oil changes and high-quality oil, you can extend the life of your engine.
Keep in mind that engine issues, if left unaddressed, can lead to further complications, including cylinder wall damage. Ultimately, taking care of your engine’s oil rings is a fundamental aspect of vehicle maintenance. It guarantees that your vehicle continues running smoothly and reliably for miles.