Physical Address
304 North Cardinal St.
Dorchester Center, MA 02124
Physical Address
304 North Cardinal St.
Dorchester Center, MA 02124
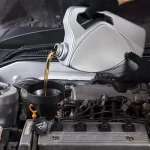
Changing the oil in your vehicle regularly is a crucial maintenance routine to keep the engine running smoothly. However, the task may become more challenging if the oil drain plug becomes rounded, making it difficult to remove.
I found two effective methods in my research to remove a rounded oil drain plug and continue with a successful oil change. The first method involves using an extractor tool, which requires securing the extractor nut and applying controlled, steady force with a ratchet.
You can also use round-jaw vice grip pliers to clamp onto the rounded plug and apply consistent pressure while turning the pliers counterclockwise.
I will explain each method with step-by-step instructions so you can remove the rounded plug and complete your oil change with ease.
![How to Remove Rounded Oil Drain Plug: 2 Methods [Step-By-Step]](https://mroilguy.com/wp-content/uploads/2023/11/How-to-Remove-Rounded-Oil-Drain-Plug.webp)
To remove a rounded oil drain plug, there are two methods you can try.
To remove a rounded oil drain plug using an extractor tool, you need to follow a few specific steps.
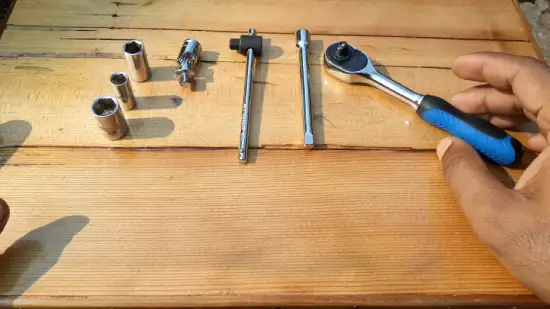
You need to look for an extractor set that matches the type and size of your rounded oil drain plug. Ensure the set has grooves or teeth designed to grip the rounded plug securely. This will ensure that the extractor tool can remove the rounded oil drain plug effectively.
Attach the extractor nut securely to the rounded drain plug using a firm grip and ensuring alignment with the grooves of the extractor socket. To ensure a tight and secure fit, gently tap the extractor socket with a hammer. This will help the extractor’s teeth grip onto the rounded plug securely.
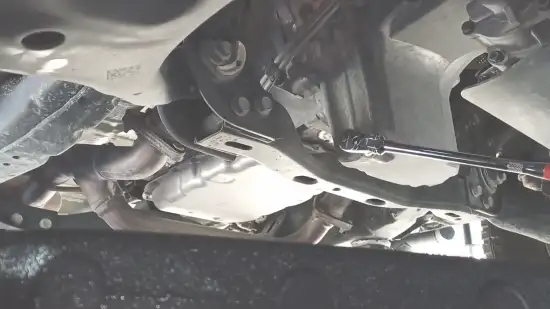
Now, set your ratchet to the ‘tighten’ position and turn it in the opposite direction of the normal loosening direction. The extractor’s grooves will grip onto the rounded plug. Apply steady, controlled force and continue turning the ratchet.
As the extractor digs into the rounded edges, the plug will gradually turn. Be patient and persistent, and catch any spilled oil.
After successfully removing the rounded plug and completing the oil change, you might consider re-securing the old drain plug instead of replacing it with a new one. However, it’s essential to ensure the old drain plug is still in good condition and not damaged or stripped.
Before re-securing the old drain plug, it’s crucial to clean the threads of both the plug and the oil pan opening thoroughly. Remove any debris or old gasket material to avoid unwanted complications.
Once the threads are clean, you can apply a small amount of thread sealant to the threads of the old drain plug. Doing this creates a secure seal and prevents oil leaks.
After applying the thread sealant, carefully thread the old drain plug into the oil pan opening and use an extractor nut to tighten it to the manufacturer’s recommended torque specifications. However, it’s crucial not to overtighten the plug, as it might lead to damage.
Double-check the drain plug for any signs of leaks. If there are none, you’ve successfully re-secured the old drain plug.
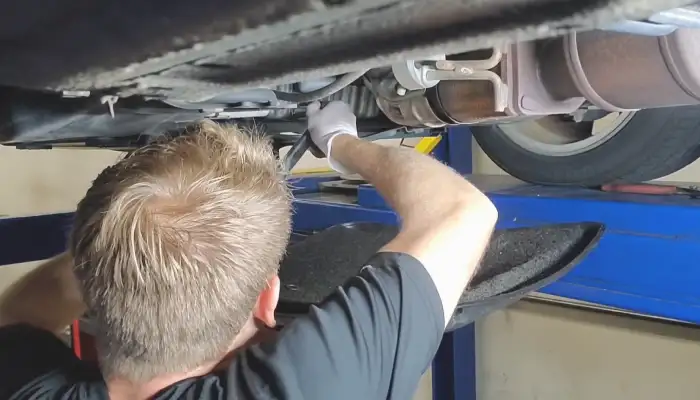
Round-jaw vice grip pliers are another effective way to remove rounded oil drain plugs. Below are the steps to remove one using round-jaw vice grip pliers.
To begin removing a rounded oil drain plug using round-jaw vice grip pliers:
Once you have allowed the penetrating oil to do its work, you can begin to attempt the removal of the rounded oil drain plug. This can be accomplished using round-jaw vice grip pliers.
To do this, you should first clamp the pliers securely onto the rounded plug. This will create a secure grip, which is necessary to apply the required amount of force.
With the round-jaw vice grip pliers in place, begin to apply consistent pressure while turning the pliers counterclockwise to loosen and remove the plug.
You must be patient and cautious during this process to avoid causing any further damage to the plug or the surrounding area. It’s crucial to be gentle and methodical.
Once you’ve successfully removed the rounded oil drain plug and completed the oil change, it’s time to re-secure the new drain plug correctly. Before re-securing the old drain plug, make sure it’s clean and free from any debris or oil residue. Wipe it down with a clean cloth or paper towel.
To re-secure the old drain plug tightly, you first need to carefully position it at the opening of the oil pan, ensuring that the threads align correctly. Start by gently turning the old drain plug clockwise by hand to get it started. This ensures that it threads correctly and reduces the risk of cross-threading.
Once the plug is hand-tightened, take your round-jaw vice grip pliers. Open the pliers and position them around the head of the old drain plug. Adjust the vice grip pliers to grip the old drain plug firmly with the round jaws clamping onto the plug’s head securely.
With the vice grip pliers in place, turn them clockwise to tighten the old drain plug further. Apply steady, controlled force to ensure the plug is securely seated and properly tightened. It’s essential not to over-tighten the drain plug, as this can damage the oil pan or strip the threads.
The ideal tightness for a rounded oil drain plug is a fine balance between not too loose to prevent oil leaks and not over-tightening to avoid damage. A good practice is to tighten the plug until the gasket touches the drain pan and give it a quarter turn.
For a leaky drain plug, an additional one-half turn past finger-tight and another one-sixth to one-quarter turn could help. However, if it persists, replacing the plug is advisable to ensure proper sealing and avoid further complications.
I would advise against using an impact wrench to tighten a rounded oil drain plug. Based on my research, impact wrenches deliver substantial torque and can easily over tighten the plug, potentially damaging the oil pan’s threads or the plug itself.
It’s safer to tighten the plug manually using a socket and a long bar to ensure you have better control over the torque applied.
I hope you’re now confident about removing a rounded oil drain plug, knowing two effective methods and the step-by-step instructions to do it. Whether you choose to use an extractor tool or round-jaw vice grip pliers, be sure to exercise patience and caution throughout the process.
Additionally, when re-securing the drain plug after an oil change, remember the importance of proper torque and the delicate balance between tightness and potential damage.
Avoid using an impact wrench to tighten a rounded plug, as it can lead to unwanted consequences. With these insights, you can navigate this challenge smoothly and ensure your vehicle’s engine continues to run smoothly.