Physical Address
304 North Cardinal St.
Dorchester Center, MA 02124
Physical Address
304 North Cardinal St.
Dorchester Center, MA 02124
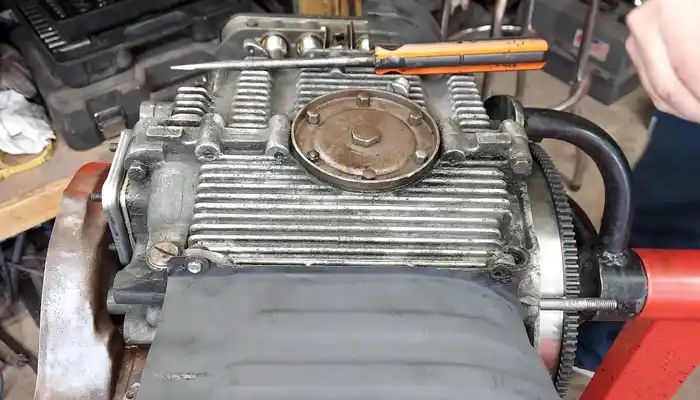
The proper functioning of an oil pressure relief valve is essential for the health and longevity of your vehicle’s engine. This unassuming component, tucked away in the engine’s heart, is critical in regulating oil pressure.
However, like any mechanical part, oil pressure relief valves can encounter issues, particularly becoming stuck.
To unstick the oil pressure relief valve, locate the valve within the engine. Clean around the valve to ensure there’s no debris or buildup. Try to loosen the valve using the appropriate tools manually. You can also apply pressure to the valve to unstick it.
In the following article, I will share the foolproof method to unstick that troublesome valve and get your engine running smoothly again. No more worrying about decreased fuel efficiency or potential engine damage.
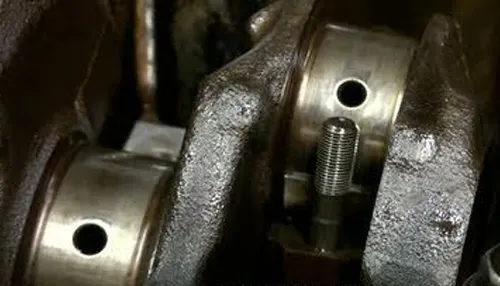
I have found that you need to follow a series of steps to unstick your vehicle’s oil pressure relief valve. And the following steps are essential to ensure you do it right.
The oil pressure relief valve is typically located behind the timing cover within the oil pump housing. To locate it, you’ll need to remove the timing cover, which is usually located at the front of the engine.
Once the timing cover is removed, you’ll be able to see the oil pump housing, which houses the oil pressure relief valve. The valve is usually positioned within the housing and can be identified by its small size and shape.
It’s important to consult your vehicle’s service manual for specific instructions on locating the oil pressure relief valve. The exact location may vary depending on the make and model of your vehicle.
Start by thoroughly cleaning the area around the valve, using a degreaser or brake cleaner to remove any dirt, oil, or contaminants. This step is crucial to ensure that no additional debris enters the engine when attempting to unstick the oil pressure relief valve.
Begin by spraying the degreaser or brake cleaner onto a clean cloth or directly onto the area surrounding the valve. Gently wipe the surface, removing any visible dirt or grime.
Take extra care to clean around the valve itself, ensuring that all accumulated oil and contaminants are effectively removed. Keep an eye out for dirt accumulating in the crevices and corners.
Once the area is clean, proceed to the next step to unstick the valve.
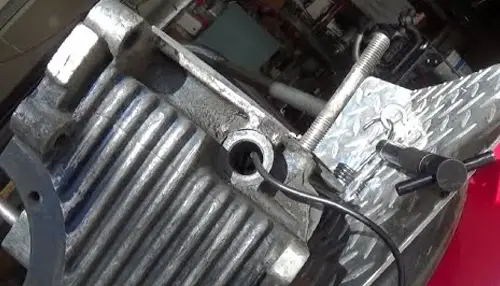
Now, it’s time to unstick the oil pressure relief valve. In my opinion, the following three methods will be helpful:
To manually loosen the oil pressure relief valve in your engine, gently manipulate it by hand to see if it can be loosened. Use caution and avoid exerting excessive force to prevent any potential damage to the valve or its housing.
Rotate the valve counterclockwise by firmly grasping it and rotating it. If the valve is stuck, you may feel resistance initially. In this case, try rocking it back and forth gently while maintaining a steady pressure.
It’s important to be patient during this process, as forcing the valve can lead to irreversible damage. If the valve begins to move freely, you have successfully unstuck it and can proceed to the next step in resolving the issue with your oil pressure relief valve.
When your car’s oil pressure relief valve becomes stuck, you can also apply controlled pressure using a blunt, non-metallic tool. This method is to use a wooden dowel and tap the valve with gradually increasing force.
Insert the blunt end of the wooden dowel onto the valve and apply gentle taps. Increase the force gradually, paying attention to any changes in the valve’s movement or resistance.
The goal is to dislodge the valve from its stuck position without causing damage. It’s important to be patient and cautious during this process, as excessive force or improper technique can lead to further problems.
To use a puller tool for unsticking the oil pressure relief valve in your vehicle engine, follow these steps:
Remember to exercise caution and patience throughout the process to avoid any unnecessary damage.
Begin by placing the valve back into its original position. Ensure it fits securely and align it with the corresponding holes or slots.
Then, reattach any bolts or screws that were removed during the disassembly process. Ensure they are tightened in accordance with the manufacturer’s instructions. Be cautious not to over-tighten, as this can cause damage.
Next, reconnect any hoses or tubes that were disconnected. Double-check that all connections are secure and leak-free.
After reassembling the components, you can now test the oil pressure relief valve to ensure it’s functioning properly in your vehicle engine.
Start by starting the engine and allowing it to idle for a few minutes. Observe the oil pressure gauge or indicator on your dashboard to ensure the oil pressure is within the manufacturer’s recommended range. Typically, it should be between 25 and 45 psi (pounds per square inch).
Listen carefully for any unusual sounds, such as knocking or rattling, which could indicate a problem with the valve. Additionally, keep an eye out for any warning indicator lights on your dashboard.
If everything appears normal and there are no issues, you can conclude that the oil pressure relief valve is working correctly.
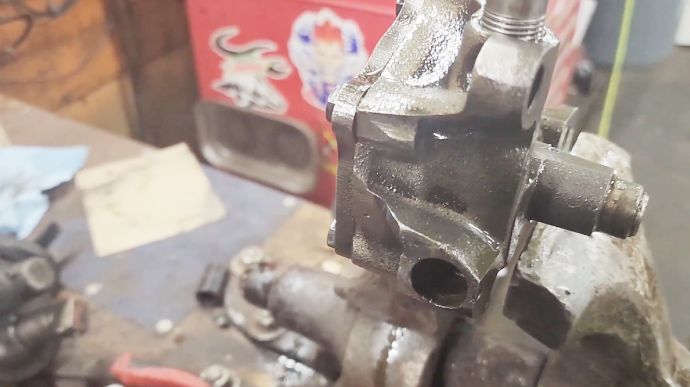
According to my research, there are several reasons for stuck oil pressure relief valves.
Over time, debris, sludge, or contaminants in the engine oil can build up around the relief valve, causing it to become stuck.
This debris can come from various sources, such as dirt, dust, metal particles, or residue from internal engine components. As the debris accumulates, it can restrict the movement of the relief valve, preventing it from opening and closing properly. This, in turn, affects the oil pressure regulation within the engine.
When wear and tear occurs in the engine, the oil pressure relief valve in your vehicle’s engine may become stuck, causing potential issues with its operation.
Constant movement and exposure to high temperatures can degrade valve components over time. The spring that controls the valve’s opening and closing may weaken or break, preventing it from functioning properly.
Additionally, the valve itself can become worn or corroded, causing it to become stuck in the closed or open position. This can result in inadequate oil pressure, leading to engine damage or failure.
If you neglect regular maintenance, your oil pressure relief valve can become stuck, leading to potential issues with its operation.
Lack of maintenance, such as infrequent or inadequate oil changes, can contribute to the valve sticking. Over time, dirt, sludge, and other contaminants can build up in the engine oil, blocking the valve from properly regulating oil pressure.
When the engine overheats, the oil may not be able to flow properly through the relief valve, resulting in a decrease in oil pressure. This can lead to insufficient lubrication of engine components, causing increased friction and heat buildup.
Additionally, high temperatures can cause the relief valve to expand and become stuck closed, preventing the oil from flowing out and cooling the engine.
When the engine oil becomes contaminated with water, fuel, or other substances, it can lead to the valve malfunctioning. Oil contamination can occur due to issues such as a faulty fuel injector, a leaking fuel line, or a damaged gasket.
When these contaminants mix with the engine oil, they can form sludge or deposits that accumulate on the valve, preventing it from functioning properly. This can result in a decrease in oil pressure and potential damage to the engine.
When the oil pressure relief valve gets stuck in your vehicle engine, several issues can arise. And I believe it’s very important to replace the valve or get a qualified mechanic to check it.
Excessive oil pressure strains the engine’s bearings, which are responsible for supporting and allowing the rotation of various engine parts. The increased pressure can lead to accelerated wear and tear on these bearings, resulting in premature failure.
Seals within the engine, such as those found in the crankshaft and camshaft, are also affected by the high oil pressure. The excessive force exerted on these seals can cause them to deform or break, leading to oil leaks and potential contamination of other engine components.
Additionally, the high oil pressure can negatively impact the lubrication system, impairing its ability to distribute oil to all the necessary engine parts properly. This can result in inadequate lubrication, leading to increased friction and heat generation, further contributing to potential damage.
You frequently experience low oil pressure when your vehicle’s oil pressure relief valve becomes stuck. When the relief valve gets stuck closed, it prevents the oil from flowing freely through the system. As a result, the oil pressure decreases, leading to inadequate lubrication of the engine parts.
Insufficient lubrication can cause accelerated wear and damage to the engine components, such as the bearings, camshaft, and crankshaft. This can result in increased friction and heat generation, leading to potential engine failure or damage.
Oil leaks can occur when your vehicle’s oil pressure relief valve sticks, leading to inadequate oil pressure regulation. When the valve gets stuck in the closed position, it prevents excess oil from flowing back into the pan.
As a result, the oil pressure builds up inside the engine, causing the oil to find alternative paths to escape. This can lead to oil seeping or spilling out of various engine components, such as gaskets, seals, or even cracks in the engine block.
The leaking oil can then drip onto the ground or other engine parts, potentially causing damage and reducing the overall efficiency of your vehicle.
When the oil pressure relief valve gets stuck in the closed position, the oil can’t circulate properly, causing a decrease in lubrication and increased friction. As a result, the engine components generate excessive heat, leading to overheating.
Overheating can have severe consequences for your vehicle’s engine, including damage to the cylinder walls, pistons, and valves. Additionally, it can cause the engine oil to break down, reducing its ability to lubricate effectively.
Warning lights and unusual engine noises indicate a stuck oil pressure relief valve in your vehicle. When the oil pressure relief valve gets stuck, it can cause the oil pressure to build up to dangerous levels.
This increased pressure can trigger warning lights on your dashboard, such as the oil pressure warning light. This light is designed to alert you to a potential problem with the oil pressure system.
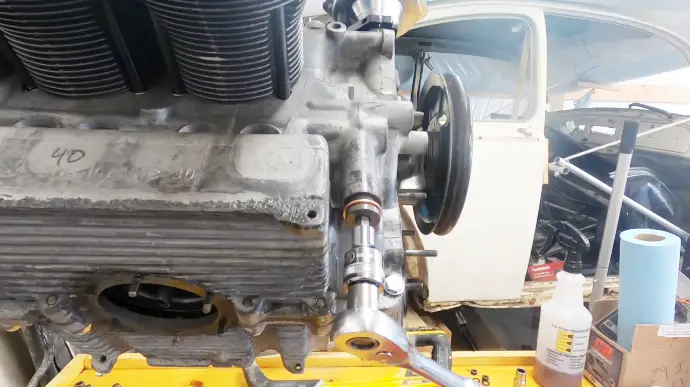
To properly maintain your vehicle engine, you should inspect the oil pressure relief valves regularly. As a general guideline, I recommend testing the oil pressure relief valves every 12 months. This ensures the valve is functioning correctly and isn’t stuck or clogged.
Regular inspections are crucial because a malfunctioning oil pressure relief valve can lead to serious engine damage. Additionally, it’s important to replace the relief valve every 3 to 5 years to ensure optimal performance and prevent any potential issues.
A stuck relief valve can significantly impact fuel efficiency in your vehicle engine. When the relief valve is stuck, it can cause irregular oil pressure, which puts additional stress on the engine. This increased stress forces the engine to work harder, resulting in higher fuel consumption.
As you can see, it’s crucial to address any issues with a stuck oil pressure relief valve in your vehicle’s engine promptly. Stuck relief valves can wreak havoc on your engine’s health, leading to a range of issues from high pressure to low pressure, overheating, and damage.
I believe neglecting this can lead to detrimental effects on the engine’s performance and potentially decrease fuel efficiency.
Regular inspections of the relief valve are recommended to ensure its proper functioning. By taking proactive measures, you can maintain the optimal performance of your vehicle and prevent any costly repairs in the future.