Physical Address
304 North Cardinal St.
Dorchester Center, MA 02124
Physical Address
304 North Cardinal St.
Dorchester Center, MA 02124

To get your EVAP monitor ready, start with a fuel tank level between 35%–85%, no active trouble codes, and a fully warmed-up engine.
Then drive steadily through specific conditions: idle for 4 minutes, 5 minutes of stop-and-go traffic, and 10 minutes cruising at 45–65 mph without shutting off the engine.
Check for loose gas caps or leaks that could disrupt readiness. Following these steps guarantees your system meets emission test requirements. Explore further for detailed diagnostics and maintenance advice.
Because fuel vapors contribute considerably to air pollution, the EVAP system plays a critical role in preventing their release into the atmosphere by capturing and recycling these vapors.
You must recognize that this system is designed to trap smog-forming hydrocarbons, reducing ground-level ozone and health risks. Since the 1970s, regulatory agencies have mandated stringent emission standards that the EVAP system helps meet. Modern EVAP systems often incorporate advanced additive technology to enhance their efficiency and durability.
It also minimizes gasoline odors inside the vehicle, improving cabin comfort. The system includes key components such as the charcoal canister which absorbs and stores fuel vapors temporarily.
By temporarily storing fuel vapors in a sealed system and recycling them into the engine for combustion, the EVAP system supports environmental sustainability and fuel efficiency.
Understanding its regulatory purpose and environmental impact is essential for accurate diagnosis and compliance with emission control regulations.
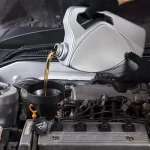
Let’s break down how the EVAP system works, shall we? First off, the charcoal canister plays a crucial role. It’s designed to trap fuel vapors, which helps prevent harmful emissions from escaping into the atmosphere. Pretty important stuff, right? Proper maintenance, including the use of penetrating oils, can help keep system components functioning smoothly.
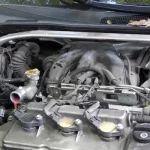
Now, once the canister has done its job, it holds onto those vapors until the engine is ready to use them. That’s where the purge valve comes in. This little component, controlled by the Powertrain Control Module (PCM), manages how those vapors flow from the canister to the engine intake.
It’s important to note that certain technical issues can affect how effectively this system operates. It only allows the vapors to enter the engine under specific conditions, ensuring they’re used efficiently for combustion.
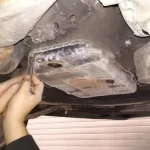
Although often overlooked, the charcoal canister plays a critical role in the EVAP system by capturing and storing fuel vapors from the fuel tank to prevent their release into the atmosphere.
It adsorbs hydrocarbons using activated charcoal granules, acting as a temporary reservoir until engine conditions allow vapor purging. This function is essential for meeting emissions regulations by controlling volatile organic compound emissions.
Proper storage and maintenance practices ensure the charcoal canister retains its adsorption capacity over time. The canister is typically located at the rear left wheelhouse and is connected via hoses and valves to the fuel tank and intake system, performing ventilation, deventilation, and temporary vapor storage for subsequent purging activated charcoal canister location.
| Function | Description |
|---|---|
| Vapor Capture | Adsorbs fuel vapors from the fuel tank |
| Storage Capacity | Typically 2.7 to 3.5 liters |
| Vapor Release Control | Releases vapors to engine during purging |
| System Integration | Connected to vent and purge valves |
Maintaining the canister’s integrity and charcoal quality guarantees compliance and system readiness.
When the engine reaches specific conditions such as temperature, load, and RPM, the purge valve opens to control the flow of fuel vapors from the charcoal canister into the intake manifold for combustion.
This electronically actuated solenoid valve, governed by the ECM or PCM, precisely meters vapor flow using pulse-width modulation. It remains closed when purging isn’t required, trapping vapors to prevent atmospheric release and maintain system pressure. Proper thermostat selection can influence engine temperature stability, which in turn affects purge valve timing and efficiency through engine temperature regulation.
During EVAP leak tests, the purge valve seals the system alongside the vent valve. You must verify the valve cycles correctly; faults like sticking or electrical failures trigger diagnostic trouble codes (e.g., P0440, P0441) and affect emissions and fuel economy.
Proper purge valve operation is essential for regulatory compliance and efficient EVAP monitor readiness. Leak detection devices, such as NVLD and ESIM, automate leak testing by applying vacuum or pressure, with the ECM monitoring feedback from sensors like the fuel tank pressure sensor to assess system integrity, which aids in accurate leak detection.
Because proper EVAP monitor readiness hinges on specific conditions, you must make certain your vehicle meets key criteria before initiating the drive cycle.
First, ensure your fuel tank is between 35% and 85% full; levels outside this range often prevent the EVAP monitor from running. Using the correct brake fluid, such as DOT 3 or DOT 4, can influence vehicle system performance during testing.
Maintain your fuel tank between 35% and 85% full to enable the EVAP monitor to activate properly.
Second, verify that the Malfunction Indicator Light (MIL) is off and there are no stored or pending emissions-related diagnostic trouble codes (DTCs), as any active or pending codes block monitor initiation.
Third, confirm your vehicle is in normal operating condition with no mechanical faults, and avoid extreme ambient temperatures which can delay readiness.
Additionally, some EVAP monitors are non-continuous monitors that require specific driving patterns or multiple cycles with cool-down periods to complete their tests.
Meeting these requirements is essential to comply with regulatory inspection standards and to enable the EVAP monitor to complete its diagnostic tests successfully.
To complete the EVAP monitor drive cycle, you’ll want to follow some specific steps. Start with a controlled idle – that means keeping your engine running at a steady pace without too much fluctuation. Proper tightening of components is crucial to avoid any leaks that could affect the EVAP system’s performance.
Next, you’ll need to hit some steady highway speeds. It’s important to accelerate and decelerate smoothly during this process, too. Oh, and don’t forget about the fuel level, temperature, and engine load! Those need to meet certain regulatory thresholds while you’re driving to make sure the monitor activates properly.
Additionally, many manufacturers require the engine to be at normal operating temperature for the EVAP monitor to run successfully. Keeping these key conditions in check is really essential for verifying EVAP readiness.
Although preparing your vehicle properly is essential, performing the required drive cycle precisely guarantees the EVAP monitor sets to “Ready.” It is also important to use the correct oil type, as engine oil properties can influence overall engine performance during the drive cycle.
You’ll start by idling the engine for four minutes to warm the system, followed by five minutes of smooth stop-and-go driving. Then, maintain a steady cruise between 45 and 65 mph for ten minutes, keeping the throttle between 9% and 35%. It is important to ensure that the vehicle’s IAT and altitude are within the specified range before beginning the drive cycle to avoid monitor failure.
Follow these steps carefully:
Avoid shutting off the ignition during this process. Repeat the cycle 2 to 3 times if the EVAP monitor doesn’t set to “Ready” initially.
Following the drive cycle steps closely sets the foundation for EVAP monitor readiness, but meeting specific driving conditions guarantees the system completes its diagnostic routine. You must drive under mixed conditions: city stop-and-go and highway speeds to generate the necessary engine load and pressure changes.
The system uses sensors such as the fuel tank pressure sensor to monitor vacuum decay and detect leaks during this process. Repeated warm-up and cool-down cycles simulate real-world vapor scenarios. After a cold soak of about six hours, a few miles of varied driving activates the EVAP monitor tests.
Avoid active MIL or pending DTCs and ensure no emission faults exist. Using the correct engine load during these conditions is crucial, as it affects the monitor’s ability to complete its tests effectively.
| Driving Condition | Requirement |
|---|---|
| Fuel Level | Between 35% and 85% capacity |
| Intake Air Temperature | 40°F to 100°F |
| Cold Soak Duration | ~6 hours |
| Driving Style | Mix of stop-and-go and highway speeds |
| Engine Load | Sufficient for emission diagnostics |
When your EVAP monitor fails to complete, it’s often due to specific, identifiable faults within the system. To resolve these issues, focus on the following key areas:
Using an appropriate Dexos oil formulation can help maintain the emissions system’s longevity and proper function, which in turn supports successful EVAP monitor completion.
Addressing these precise faults ensures your EVAP system can successfully complete its monitor cycle, complying with regulatory standards and preventing persistent diagnostic trouble codes.
After addressing common faults that hinder EVAP monitor completion, you’ll need to verify the system’s readiness using diagnostic tools.
Start by connecting an OBD2 scanner, preferably advanced or professional-grade, to the vehicle’s diagnostic port. Using advanced formulations in the scanner software can improve the accuracy of EVAP system diagnostics.
Begin by hooking up a professional-grade OBD2 scanner to the vehicle’s diagnostic port.
Access the “Readiness Monitors” menu and locate the EVAP monitor status, which reads as “Ready,” “Not Ready,” or “Complete.” This step is crucial because advanced diagnostic tools provide critical real-time data that basic scanners cannot.
Avoid basic code readers that don’t display monitor status. Use live data functions to observe purge valve commands and system pressure, identifying potential leaks or blockages. Advanced scanners let you perform EVAP-specific tests like solenoid activation and automated leak detection.
Track monitor status over multiple drive cycles for accuracy. This precise approach guarantees compliance with regulatory standards and confirms your EVAP system is fully operational before inspection.
Although EVAP system faults can be addressed through diagnostics and repairs, maintaining continuous readiness requires diligent upkeep of key components. You must focus on routine maintenance to prevent vapor leaks and system failures. Follow these essential steps:
Adhering to these practices ensures your EVAP system remains compliant and monitor ready.
Yes, extreme weather can substantially affect your EVAP monitor readiness. Both very hot and very cold temperatures disrupt the system’s ability to run diagnostics properly. High heat increases fuel volatility, while cold temperatures alter vapor behavior, preventing tests from initiating.
Rapid weather changes or unstable ambient pressures also delay monitor completion. To guarantee readiness, you must operate your vehicle in moderate, stable conditions, following required drive cycles and fuel level guidelines.
Fuel type subtly influences your EVAP system tests by affecting vapor pressure and canister performance.
Ethanol blends gently challenge the carbon canister’s capacity, causing quicker saturation and higher emissions.
This means your tests must account for increased fuel volatility and stricter durability criteria, especially when using E10 or higher blends.
Ensuring compliance requires precise calibration and updated protocols that reflect these nuanced fuel characteristics and their regulatory implications.
You don’t always need professional service to reset EVAP readiness; you can complete proper drive cycles, maintain fuel levels between 1/4 and 3/4 tank, and fix gas cap leaks yourself.
However, if your vehicle has aftermarket tunes, persistent faults, or complex EVAP issues, professional diagnostics may be necessary.
Also, some states require certified technicians for emissions testing, so professional service might be mandated by local regulations for compliance.
Aftermarket modifications often disrupt EVAP readiness by removing or disabling key components like the charcoal canister or purge valve.
You’ll find that performance tunes or altered fuel systems can disable EVAP diagnostic routines, causing persistent “not ready” statuses.
These changes typically prevent the monitor from completing leak or purge tests, leading to failed emissions inspections.
To regain readiness, you must restore OEM parts and apply compliant ECU tuning.
Think of your EVAP monitor like a vintage hourglass. It won’t keep its status forever. Typically, it stays ready for about 3 to 7 days without driving.
Some vehicles hold it up to 10 days if the battery stays healthy. Any period of inactivity beyond this resets the monitor.
Battery disconnects or code clearings reset it instantly. So, keep your vehicle active and avoid interruptions to maintain regulatory compliance.
Getting your EVAP monitor ready is like tuning a finely crafted instrument. You need precision, patience, and the right steps. By understanding your EVAP system, performing the proper drive cycle, and addressing common issues promptly, you guarantee your vehicle stays compliant with emissions regulations.
Use diagnostic tools regularly and maintain your system diligently to keep the monitor clear and ready. This helps avoid costly delays and ensures your vehicle runs clean and efficiently every time.