Physical Address
304 North Cardinal St.
Dorchester Center, MA 02124
Physical Address
304 North Cardinal St.
Dorchester Center, MA 02124

To bleed your car radiator, first make sure the engine is completely cool. Then park on a level or slight incline with the radiator at the highest point.
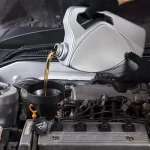
Drain old coolant safely, refill slowly with the correct 50/50 coolant mix using a spill-proof funnel, and open bleeder valves until air bubbles stop.
Run the engine with the heater on max to circulate coolant and monitor temperature. Once a steady flow is confirmed, securely replace caps and check for leaks.
Step-by-step guidance will refine your process further.

Before you begin bleeding a car radiator, make sure the vehicle is parked on a level surface and the engine is completely cool to prevent uneven coolant distribution and avoid burns.
Confirm the engine has cooled for at least 2-3 hours, checking the temperature gauge and feeling the radiator to guarantee it’s cold. Monitoring the temperature gauge can also help detect early signs of overheating before starting.
If you elevate the front for better air escape, secure the car with jack stands to prevent movement or rolling. Wear gloves and safety goggles to protect against coolant irritation and splashes, and cover exposed skin to avoid toxicity risks.
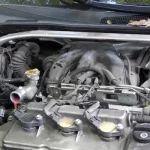
Avoid loose clothing that could catch on engine parts. Prepare rags or towels for immediate spill cleanup. Open the hood fully and inspect hoses and connections for leaks before proceeding with the bleeding process, as coolant leaks can affect system efficiency and cause overheating.
To bleed your car radiator effectively, you’ll need a few specific hand tools. Think socket sets, wrenches, and screwdrivers that are just right for your vehicle’s fittings.
It’s super important to use the correct type of coolant too—whether it’s premixed or a properly diluted concentrate. Just make sure it matches your manufacturer’s specifications. Using fluids that meet OEM certifications ensures compatibility and optimal performance.
Having all these essential tools and fluids ready will really help you have a smooth, contamination-free bleeding process. Removing trapped air in the coolant system is crucial because it can cause overheating and reduce cooling efficiency. So, gather everything you need, and you’ll be good to go!
Gathering the right tools sets you up for a smooth and efficient radiator bleeding process. You’ll need a spill-free funnel with adaptors to securely seal the radiator neck, preventing coolant spills and air bubbles during filling.
A socket, wrench, and ratchet set is essential for removing radiator caps, drain plugs, and loosening bleed valves precisely. Using the correct tools helps to effectively remove air pockets trapped within the cooling system.
Use pliers and screwdrivers for accessing hoses and fittings. Safety gloves and glasses protect you from hot coolant and chemical exposure throughout. Position a drain pan beneath the radiator drain plug to catch old coolant and prevent spills.
For advanced tasks, a vacuum purge refill kit with universal adaptors and a cooling system test kit streamline bleeding and purging. Organize components in a blow mold case for efficiency.
Select the correct coolant type based on your vehicle’s engine materials and manufacturer specifications to guarantee peak performance and longevity.
Use Organic Acid Technology (OAT) coolant for modern aluminum engines, Hybrid OAT (HOAT) for mixed-metal systems, and Inorganic Acid Technology (IAT) for older cast iron engines.
Choosing a coolant with the appropriate corrosion inhibitors helps prevent pitting and galvanic corrosion in aluminum radiators. Avoid relying solely on color coding, as it varies and isn’t a universal indicator.
Always consult your vehicle manual for OEM-recommended coolant. For best freeze and boil protection, use a 50/50 mix of ethylene glycol-based antifreeze and distilled water. Avoid tap water to prevent mineral deposits and corrosion.
Pre-mixed 50/50 coolants eliminate mixing errors. When filling, pour slowly to prevent air entrapment, filling the radiator and reservoir to the correct levels for efficient system operation.
Park the vehicle on a level or slightly uphill surface to position the radiator cap at the highest point of the cooling system, facilitating effective air bleeding.
Before starting the coolant bleeding process, position your vehicle so the radiator sits at its highest point by safely jacking up the front end or parking on level ground if elevation isn’t possible.
Secure the vehicle with stands or ramps to guarantee stability. This elevation uses gravity to facilitate air escape from the cooling system.
Next, guarantee the engine is completely cool before removing the radiator cap to prevent burns and pressure-related injuries. The cooling system functions to remove heat from the engine and maintain proper temperature. Use a coolant that meets OEM specifications to ensure optimal engine protection.
Twist the cap to its first lock position initially, then fully remove once cooled. Prepare the correct 50/50 coolant-to-water mixture compatible with your system. Use a spill-proof funnel to avoid air bubbles during filling. Have a wrench ready for the bleed valve if applicable, and keep rags nearby for any spills.
Start by ensuring the engine has fully cooled to prevent burns from hot coolant. Position your vehicle on a level surface, engage the parking brake, and wear gloves and eye protection.
Turn the heater control to maximum hot to facilitate complete drainage, which also helps to bleed air from the cooling system.
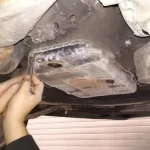
Locate the radiator drain valve or petcock at the radiator’s lower corner, usually on the driver’s side. If absent, identify the lower radiator hose.
Place a large-capacity drain pan beneath the drain point, then remove the radiator or reservoir cap to release pressure.
Use a socket or spanner to twist open the drain valve, directing flow into the pan. Ensure that all coolant is collected properly to avoid environmental contamination and to follow safe disposal practices.
Allow coolant to drain until it slows to a drip, then securely tighten the valve. Collect all drained coolant for proper recycling at a certified facility.

Once you’ve securely closed the radiator drain valve and collected the old coolant, you can proceed to refill the system with fresh coolant.
Use a recommended 50/50 mix of antifreeze and distilled water unless your climate requires a different ratio. Position the vehicle on an upward incline to facilitate filling and prevent air pockets.
It is important to use distilled water when mixing concentrated antifreeze to ensure optimal performance and prevent corrosion. Using a high-quality radiator flush product before refilling can help remove rust and buildup for improved cooling efficiency.
Follow these steps methodically:
This precise filling procedure lays the foundation for effective air bleeding and optimized cooling system performance.
To kick off the coolant circulation, you’ll need to run the engine immediately after filling the radiator. Ensure the cap or funnel stays securely in place to prevent spills.
Idle the engine for several minutes with the heater set to maximum hot to push air bubbles upward. Monitor the temperature gauge closely to avoid overheating.
It is also important to open or crack the radiator bleed port or the rear manifold bleed lines to allow trapped air to escape during this process, facilitating a more effective system bleeding. Using a thermostat calibrated for proper engine temperature helps maintain safe operating conditions during this step.
Occasionally rev the engine to 3,000 RPM to dislodge trapped air and squeeze radiator hoses to aid bubble movement. Continuously top up coolant as the level drops.
| Step | Action |
|---|---|
| Initial Idle | Warm engine, heater on max hot |
| Monitor Gauge | Watch temp, avoid overheating |
| Rev Engine | 3,000 RPM bursts, squeeze hoses |
| Coolant Top-up | Maintain level as air escapes |
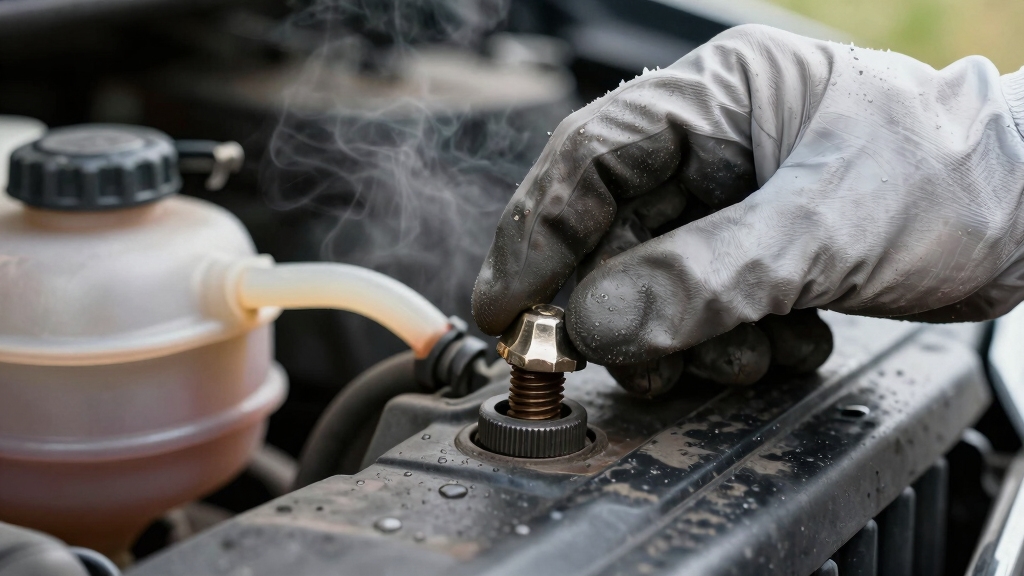
First, find the bleeder valve on your radiator. It’s usually located at the top or front, often close to the thermostat housing. If you’re unsure, just check your owner’s manual for guidance.
Now, when you’re ready to remove the trapped air, gently loosen the valve—just don’t take it all the way out. As you’re filling the coolant, keep an ear out for a hissing sound; that’s the air escaping.
You’ll know you’re on the right track. This process is important because air pockets can block coolant flow and cause overheating. Maintaining proper coolant circulation also helps achieve faster engine warm-up and reduces engine wear.
Keep an eye on the coolant flow. Once you see it coming out steadily without any bubbles, you can go ahead and tighten the valve back up securely. This will help prevent any leaks and ensure your system is back to the right pressure.
You’ll want to focus on the highest points in the cooling system where coolant circulates, as these spots typically house the bleeder valves. Ensuring the area around the valve is clean before opening it helps prevent contaminants from entering the system, similar to the importance of cleaning around valves in other automotive maintenance tasks.
Common locations include the top of the thermostat housing, near the water pump, or on the radiator itself if equipped with a dedicated bleed screw.
Keep in mind, not all engines have bleeder valves, and their placement varies by make and model. To locate them effectively:
This methodical approach assures you identify the correct bleeder valve to release trapped air efficiently.
After identifying the correct bleeder valves, prepare the cooling system for bleeding by ensuring the engine is completely cool and the coolant mixture is properly diluted to 50% concentration. The coolant absorbs engine heat and helps prevent overheating during the bleeding process. Properly venting air ensures stable system pressure and prevents hot spots.
Remove the radiator cap and slowly fill the radiator using a spill-proof funnel to prevent air bubbles. Using a spill-proof funnel minimizes the chance of introducing air into the system and fluid loss.
Open the bleeder valves simultaneously during filling until coolant flows steadily from each valve, then close them. Set the heater to maximum hot, start the engine, and monitor coolant circulation by checking heat output.
Carefully open the bleeder valves while the engine runs, releasing trapped air until only coolant flows. Close valves immediately once bubbles cease.
Keep an eye on coolant temperature to avoid overheating. Repeat the bleeding if additional air appears. After stabilization, shut off the engine, allow cooldown, top off coolant, and securely replace the radiator cap.
Monitoring coolant levels and temperature involves systematic visual inspections and instrumental measurements to guarantee the cooling system operates within safe parameters.
Begin by checking the coolant reservoir’s translucent side for fluid levels, ensuring they remain between the minimum and maximum markers when the engine is cold.
Check the coolant reservoir’s translucent side for fluid levels when the engine is cold.
Observe the coolant’s color and clarity; any murkiness or rust signals the need for replacement. Next, use a multimeter set to 20 DC volts to detect electrolysis by probing the coolant and chassis ground.
Readings above 0.4 volts indicate coolant degradation. Finally, monitor the temperature gauge after engine warmup, confirming steady coolant flow from the bleed valve before sealing it.
Perform these checks methodically to maintain peak system functionality and prevent overheating.
Although the engine must be completely cool before handling, securing the radiator cap requires careful attention to safety and technique to prevent injury and guarantee system integrity.
Align the new or inspected cap with the radiator’s tabs and slots. Push down firmly while twisting clockwise until it locks securely and can’t turn further.
Avoid tools to prevent damage to plastic components. Forcing the cap with pliers or other tools can cause damage to surrounding parts and should be avoided. Inspect the cap gasket and spring for dryness or cracks before installation, replacing the cap if worn.
Apply the same careful push-and-twist method to secure the reservoir cap after bleeding. Proper cap installation safeguards effective pressure relief and coolant containment.
Regularly inspect caps during coolant checks to detect wear early and prevent leaks or overheating. Never force stuck caps; improper technique causes damage, not mechanical failure.
Let’s kick things off by running the engine. We want to check that the temperature gauge is stable and that the heater is really cranking out maximum heat. Keep an eye out for any air bubbles in the coolant flow, okay? If you spot any, don’t hesitate to use the bleeder valve to get rid of them.
And hey, if you notice any temperature fluctuations or heating issues, make sure to address them right away. This will help confirm that the bleeding process is fully complete and that proper coolant flow is maintained to prevent engine damage. Got it?
Regularly verifying temperature stability guarantees your cooling system operates efficiently after bleeding the radiator.
Begin by running the engine at idle for 10-20 minutes to reach operating temperature. Use an infrared thermometer to measure hose temperatures, checking for thermostat malfunction: a cool lower hose suggests a stuck closed thermostat, while a persistently warm lower hose at startup indicates a stuck open thermostat.
Understanding that the engine coolant thermostat controls coolant flow toward the radiator helps explain these temperature variations. Next, test the coolant temperature sensor resistance by heating and cooling it, ensuring readings match manufacturer specifications.
Finally, verify system integrity by pressurizing the cooling system to the radiator cap’s rating, watching for pressure drops or leaks.
After confirming temperature stability and system integrity, verify heater performance to assure proper cabin heating and detect any cooling circuit issues.
Start the engine and set the heater to maximum temperature and fan speed. Allow the system to reach operating temperature, then check for steady warm air output.
Inspect heater hoses for consistent warmth and absence of leaks. Use pressure testing to assure no drops indicate internal leaks. Maintaining the cooling system within the typical operating pressure range ensures optimal heat transfer and prevents overheating.
Confirm the radiator cap maintains pressure within the 12-18 psi range to avoid coolant loss affecting heater function.
| Checkpoint | Expected Result | Action if Failed |
|---|---|---|
| Heater air output | Warm, steady airflow | Inspect heater core and hoses |
| Hose temperature | Evenly warm | Look for blockages or leaks |
| Pressure stability | Steady at rated psi | Replace radiator cap or repair |
When you reinstall the radiator cap and take your vehicle for a test drive, you’ll help circulate the coolant and dislodge any remaining air bubbles trapped in the system.
Follow manufacturer-specific procedures, especially for vehicles like the 2002 BMW 330Ci that require special coolant and bleeding instructions. Monitor the engine temperature gauge closely for stability and gently rev the engine to accelerate air purging.
After driving, allow the radiator to cool completely before checking coolant levels. To resolve persistent air bubbles, follow these steps:
You shouldn’t use distilled water alone for coolant mixing because it lacks minerals. This can strip electrons from cooling system metals and cause corrosion.
Instead, mix 50% coolant with a blend of distilled or de-ionized water and softened tap water. This balances minerals and prevents damage.
If you must use distilled water in emergencies, top off quickly and restore the proper 50/50 coolant mix to protect your radiator and engine over time.
You should bleed your car radiator every time you change the coolant or perform a flush, typically every 24,000 to 36,000 miles or every 2 to 3 years.
Regular bleeding removes trapped air, ensuring peak coolant circulation and preventing overheating.
If you notice overheating or coolant discoloration sooner, bleed it immediately.
Consistent bleeding maintains system efficiency, prevents corrosion, and extends engine life, especially when using distilled water in a 50/50 coolant mix.
A faulty radiator bleed valve is like a locked gate blocking the coolant’s path.
You’ll notice persistent overheating and coolant leaks near the valve housing. The valve might be stripped, rusted, or stuck, preventing air release.
Signs include fluctuating temperature gauges, no heat from vents, and air pockets trapped in the system despite bleeding attempts. If the valve won’t open, you’ll likely need a full housing replacement to restore proper coolant flow.
Yes, you need to bleed the radiator after a coolant flush.
Air pockets trapped in the system reduce coolant flow and cause overheating.
To restore peak cooling, you should run the engine with the cap off, use the bleeder screw if available, and cycle the heater at full blast to expel air.
Repeating these steps guarantees trapped air exits, improving heater performance and preventing corrosion from stagnant pockets.
Only about 15% of overheating cases resolve permanently through bleeding alone.
You can fix overheating temporarily by removing trapped air, which restores coolant flow and normal temperature.
However, if you don’t address faulty thermostats, water pumps, leaks, or blockages, overheating will persist.
Bleeding is a precise step, not a cure-all. To prevent recurring issues, you must diagnose and repair underlying faults beyond just expelling air pockets.
By carefully following each step, you’ll make certain your radiator is free of trapped air, preventing overheating and maintaining peak engine performance.
Remember, even a tiny bubble can cause your engine to run hotter than the surface of the sun. Stay methodical: monitor coolant levels, secure all caps tightly, and test thoroughly.
With precision and patience, you’ll keep your cooling system running smoothly and extend your vehicle’s lifespan markedly.