Physical Address
304 North Cardinal St.
Dorchester Center, MA 02124
Physical Address
304 North Cardinal St.
Dorchester Center, MA 02124
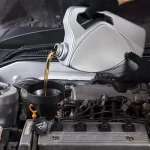
To clean a gas can, first empty all fuel and store or dispose of it safely. Use dish soap and hot water inside the can, adding smooth abrasives like small gravel if needed.
Then seal and shake vigorously to loosen dirt. Rinse multiple times with clean water until all soap is gone.
Do a final swish with fresh gasoline before draining. Always air dry completely in a well-ventilated spot to prevent rust and contamination.
Following these steps guarantees your gas can stays safe and ready; there’s more to reflect on for peak maintenance.

Before you start cleaning, make sure to empty your gas can completely. Dispose of all remaining gasoline, diesel, or kerosene properly at a household hazardous waste facility to avoid environmental hazards.
Once empty, remove any loose debris from the spout, cap, and vent areas. Select a well-ventilated workspace to minimize inhalation risks and ensure moisture evaporates efficiently during drying.
Avoid steam cleaning metal cans, as this accelerates rust formation. Check the can for visible damage or corrosion before proceeding. Seal all openings securely to prevent spills when shaking the interior during cleaning.
Proper preparation prevents contamination and maximizes cleaning effectiveness, guaranteeing your gas can is safe and ready for the next steps in the cleaning process. For optimal fuel longevity, store your gas can in approved, airtight containers kept in cool, dry environments.
To clean your gas can effectively, you’ll want to gather some basic supplies. Think dish soap, hot water, and a soft-bristled brush. These are your go-to items for a good scrub.
Now, if you’re dealing with some tough grime, you might consider using optional abrasives like screws or gravel. They can really help get rid of those stubborn spots inside the can.
So, before you dive in, make sure you have all these tools ready to ensure a smooth cleaning process! Proper cleaning also helps prevent microbial growth that can degrade fuel quality and damage equipment.
Typically, cleaning a gas can requires a few specific supplies to guarantee thorough and safe removal of dirt, grime, and residue. You’ll want to have these essentials on hand to ensure effective cleaning without damaging the can or leaving harmful contaminants.
Dish soap: Breaks down oil and residue inside and outside the can.
Hot water: Enhances soap’s cleaning power and helps dissolve grime.
Soft-bristled brush: Reaches crevices and scrubs dirt without scratching surfaces.
Protective gloves: Shields your skin from chemicals and residual fuel.
Using these tools, you can safely and efficiently clean your gas can, preparing it for reuse while preventing contamination.
Avoid harsh abrasives or chemicals that could damage the material or leave unsafe residues. For best results, it is important to handle waste/disposal properly to protect both people and the environment during cleaning.
Occasionally, adding abrasive materials like screws or gravel can markedly enhance the cleaning of stubborn grime inside your gas can.
These abrasives act as scrubbing agents when you shake the can filled with soapy water, effectively dislodging hardened residues that brushes alone mightn’t remove.
Use small, clean screws or smooth gravel to avoid damaging the interior. After adding abrasives, seal the can tightly and shake vigorously to maximize contact with all surfaces.
Remember to dump the abrasive solution and rinse thoroughly afterward to eliminate loosened debris and soap residues.
Incorporating abrasives is especially helpful for metal cans with accumulated grime but isn’t mandatory for light cleaning.
Always prioritize safety; avoid using sharp or corrosive abrasives that could compromise the can’s integrity or safety during future use.
For tough rust or grime buildup, applying a penetrating oil before cleaning can help loosen and dissolve residues, making the abrasive action more effective.
When cleaning the exterior of a gas can, start by mixing dish soap with warm water in a bucket to create a soapy solution.
Use a soft-bristled brush soaked in the solution to scrub all surfaces thoroughly, including the base, cap, and spout. Rinse the brush frequently to remove trapped dirt and oil.
Avoid using harsh abrasives or steam cleaning, especially on metal cans, to prevent damage or rust.
Follow these steps for safe and effective exterior cleaning:
Empty the gas can completely before cleaning. Work in a well-ventilated area to avoid inhaling fumes. Use gentle scrubbing tools to protect the can’s surface. Rinse thoroughly with clean water and air dry completely before storage or reuse. It is also important to identify the cause of condensation to prevent moisture buildup during storage.
Begin cleaning the interior of your gas can by pouring in dish soap without measuring. Then, fill it halfway with hot water.
Add small abrasives like screws or gravel if grime is stubborn. Seal all openings tightly, then shake the can vigorously to dislodge residue.
Dump the solution and repeat until clean.
| Step | Purpose |
|---|---|
| Pour soap & water | Loosen dirt and oil |
| Add abrasives | Scrub tough grime internally |
| Shake & dump | Remove loosened contaminants |
This method guarantees thorough cleaning without damaging the can. Always perform this task in a well-ventilated area to avoid inhaling fumes. Using proper cleaning techniques helps maintain system integrity and prevents contamination.
Repeat as necessary for heavily soiled cans before moving to rinsing.
To start, fill your gas can with clean water and give it a good shake. You really want to make sure that the water gets in there and rinses out all that soap residue. It might take a few tries, so don’t be surprised if you have to repeat this rinse cycle a couple of times. Just keep going until the water runs clear and you can’t see any soap left.
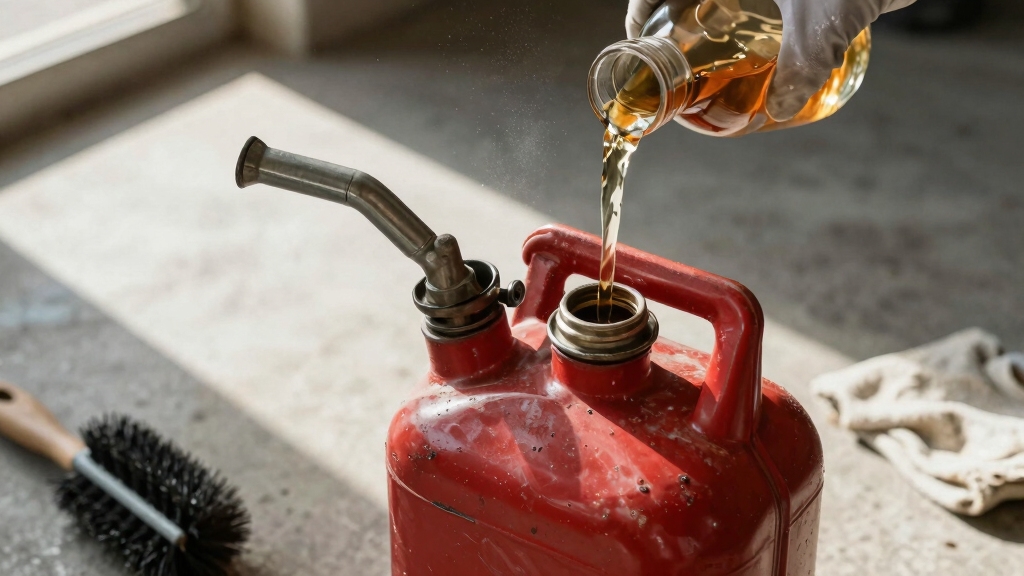
Once you’re satisfied that you’ve rinsed it well, there’s an easy final step. Swirl a little bit of gasoline inside the can. This helps evaporate any leftover moisture, which is super important. After that, just let it dry, and you’re all set! Regularly checking for water accumulation in your fuel containers can help prevent contamination and maintain fuel quality.
Consistently rinsing your gas can multiple times is essential to eliminate all soap residue that could contaminate fuel. After dumping the soapy solution, fill the can with clean water and shake vigorously.
Dump the rinse water and inspect for any soapiness. Repeat this rinse cycle until the water runs clear and free of suds. This secures no detergent remains that might degrade fuel quality or engine performance.
To optimize multiple rinse cycles:
Use vigorous shaking to dislodge residual soap from interior surfaces. Empty rinse water completely after each cycle to avoid dilution.
Repeat until rinse water shows no visible soap or foam. Perform a final dry swish with a small amount of gasoline if needed for complete residue removal.
Following these steps guarantees a thoroughly cleaned and safe gas can for storage and use. Proper handling and storage in leak-proof containers help prevent contamination and environmental hazards.
Regularly using clean water during rinsing guarantees that all soap residue is effectively removed from your gas can.
After dumping the soapy solution, fill the can halfway with fresh, clean water. Seal all caps securely and shake vigorously to reach all interior surfaces.
Empty the rinse water completely, then repeat this process several times until no soap suds or residue appear.
Avoid using contaminated or dirty water, as it may leave deposits or reduce rinsing efficiency.
Using clean water guarantees that no cleaning agents remain, which could degrade fuel quality or cause clogs.
Maintain consistent rinse cycles and inspect the water clarity after each cycle to confirm thorough removal.
This step is critical before moving on to any final drying or fuel swishing procedures.
For best results, ensure proper ventilation during cleaning to minimize exposure to any volatile organic compounds.
Before storing or refilling your gas can, give it a final swish with a small amount of clean gasoline to remove any remaining soap residue. This step guarantees no soap traces remain that could contaminate fresh fuel or cause foaming during use.
Pour in a modest amount, seal the can tightly, and shake vigorously to reach all interior surfaces. Then, safely pour out the gasoline for proper use or disposal.
Keep in mind: Use only clean, fresh gasoline to avoid introducing dirt or water. Shake firmly but controlled to avoid spills or pressure buildup. Avoid overfilling; a small amount is sufficient for rinsing. Allow the can to air dry completely after this final rinse to prevent moisture contamination.
For long-term fuel storage, consider using a fuel stabilizer to maintain gasoline integrity and prevent degradation.
This final swish guarantees your gas can is ready for safe, clean fuel storage.
Properly drying your gas can is crucial to prevent water contamination that can degrade fuel quality and damage your engine. After rinsing, place the can in a well-ventilated area or under direct sunlight. This promotes complete evaporation of moisture.
Multiple drying cycles may be necessary, especially if the can was filled with water during cleaning. Inspect spouts and caps for powdery residues and wash them off if present. Never store the can until fully dry to avoid fuel contamination.
| Step | Importance | Result |
|---|---|---|
| Air dry in sunlight | Evaporates moisture rapidly | Prevents water buildup |
| Ventilated area | Enhances airflow | Speeds drying time |
| Inspect & clean spouts | Removes residues | Guarantees fuel purity |
After thoroughly drying your gas can, you should avoid steam cleaning metal cans to prevent rapid rust formation. Steam introduces moisture and heat that accelerate oxidation, compromising the structural integrity of the can.
Instead, rely on safer cleaning methods to maintain durability and safety.
Keep these points in mind:
Steam cleaning traps moisture, causing immediate rust and corrosion on metal surfaces. High heat damages protective paint and coatings, exposing raw metal. Residual water inside the can after steam cleaning increases contamination risk.
Alternative cleaning with dish soap, hot water, and mechanical agitation effectively removes grime without damage.
When you’re ready to get rid of old fuel, make sure to dispose of it as household hazardous waste to prevent environmental damage and safety hazards.
Never pour gasoline, diesel, or kerosene down drains, on soil, or into water systems.
Avoid pouring gasoline, diesel, or kerosene into drains, soil, or water to protect the environment.
Instead, store the fuel in an approved container with a secure cap, clearly labeled as “old fuel.”
Contact your local waste management facility or hazardous waste collection center to learn accepted drop-off locations and times.
Transport the fuel carefully to avoid spills or leaks.
If you can’t locate a disposal site, check for community hazardous waste events.
Proper disposal protects water quality, soil, and air from contamination and reduces fire risk.
Always follow local regulations to guarantee compliance and safety.
Disposing of old fuel safely helps prevent contamination, but your gas can itself can still harbor residues that affect new fuel quality. You should repeat the cleaning process whenever you detect lingering odors, visible residue, or contamination signs inside the can.
Repeating cleaning guarantees no grime or old fuel remains, which could degrade fresh gasoline. Consider multiple cleaning cycles if you use non-premixed fuels, as they leave more deposits.
Repeat cleaning when:
Following these guidelines preserves fuel integrity and prevents engine issues caused by contamination.
You shouldn’t use bleach to disinfect your gas can.
Bleach can react with residual fuel vapors, creating hazardous fumes or corrosion inside the can.
Instead, use dish soap and hot water to clean it thoroughly.
Follow with multiple rinses and make certain it dries completely in a ventilated area.
Avoid harsh chemicals like bleach to maintain the can’s integrity and prevent contamination or safety risks during future fuel storage.
After cleaning, store your gas can in a cool, dry, well-ventilated area away from heat sources or open flames.
Make certain the cap and vent are tightly sealed to prevent vapor leaks.
Keep the can upright on a stable surface to avoid spills.
Label it clearly and store it off the ground to reduce corrosion risk.
Regularly inspect the can for damage or residue before reuse to maintain safety and fuel quality.
Noticed rust inside your gas can? First, empty and rinse it thoroughly.
Then, add a rust remover or a mixture of vinegar and water. Seal the can and shake vigorously to break up rust.
Rinse multiple times to remove residues. Dry completely in a well-ventilated spot to prevent further corrosion.
Can you afford to let rust contaminate your fuel? Regular inspection and maintenance will keep your gas can safe and functional.
You shouldn’t use a pressure washer to clean a gas can, especially if it’s metal. The high-pressure water can cause rust to form immediately, damaging the can’s integrity.
Instead, stick to manual cleaning with soap, hot water, and a soft brush. For stubborn grime inside, add abrasives like screws or gravel, shake well, then rinse thoroughly.
Always air dry in a ventilated area to prevent moisture buildup and contamination.
A gas can that smells like old fuel is a ticking time bomb for your engine’s health. You shouldn’t use it without cleaning, as leftover residues can contaminate fresh fuel and cause poor performance or damage.
Always empty, scrub, rinse thoroughly, and dry the can before refilling. If the smell lingers, repeat the process to make certain no harmful deposits remain. This protects both your equipment and safety.
You’ve just put effort into cleaning your gas can, only to realize it’s designed to hold fuel, not a spa day. But don’t let the irony fool you: keeping it spotless inside and out prevents contamination, prolongs its life, and safeguards your engine.
Skip the steam cleaning and handle old fuel responsibly. A clean gas can might not win beauty contests, but it guarantees your equipment runs smoothly when you need it most.